
Microsoft Word cheat sheet.
Having Microsoft Word installed on your computer is helpful, regardless of your role – executive, company, teacher, or student. It has benefited millions and is still growing as one of the most well-known and commonly used applications in the Microsoft Office suite.
The primary purposes of Microsoft Word are for publishing and content preparation. It lets you add flexibility to your papers to improve your job, reduce mistake margins, and make them look more professional. The user-friendly layout makes it an excellent experience for novices, experts, and everyone. As a result, this Microsoft Word cheat sheet will enable you to become proficient with the application.
Thanks to its extensive user base, Microsoft Word files are now often used to exchange text documents. Nobody can access Microsoft Word files, even if they don’t have Word. They can view your file with a web browser, a third-party viewer, or another word processor.
Microsoft Word has long been the preferred publishing program for individual users and many businesses, serving as more than just a file format. Microsoft Word is known for its cutting-edge features, like Office Clipboard and AutoCorrect, and its straightforward Ribbon interface, frequently copied by rival programs.
Microsoft Word makes it as simple as possible to write an invoice for your business, print a flyer for a garage sale in your neighborhood, or create an essay. There’s no waiting around to get your hands on the product that so many people rely on when it has such unique features at your disposal. Regardless of your level of computer experience, our cheat sheet, tips, and techniques will come in handy when you’re writing in Microsoft Word.
Learn how to use the Ribbon interface.
The Ribbon was first included in Office 2007 and has since become a significant component of Office programs. It was designed to make work go more quickly rather than having to go through numerous tiers of sub-menus and outdated menus. With the Ribbon, you can access the tools you know and love more rapidly because of its virtually 100% visual interface and simple navigation. It is your primary and exclusive method of interacting with Word, allowing you to format text, add elements, modify your document, and access features.
Word 2016 and Word 2019 have a flatter Ribbon than previous Microsoft Word editions, allowing less clutter on your screen to divert your attention from your work. Word stands out from rivals thanks to its minimalist design, which offers a contemporary and fashionable appearance.
Word is noted for its trademark color, blue, which has stayed the same even with the most recent version. But since Word 2016, some tabs have seen minor adjustments. For example, instead of being all capitals, all tab names are now in sentence case. Additionally, specific tab names were altered. For instance, the Page Layout tab’s contents are now under Layout.


All commands should be roughly where they were in previous Microsoft Word versions. This allows Word 2016 and Word 2019 users to start with Word 2016 and Word 2019 fast. Need help locating something? Utilize the “Tell me what you want to do” function in Microsoft. If you prefer not to skip forward, we will discuss that later.
How the Ribbon Is Hidden
You may always use the Ctrl + F1 keyboard shortcut to quickly hide the Ribbon when necessary. You may use the duplicate two keys to have it appear again. Since this shortcut works with all Office programs, including Excel and PowerPoint, we recommend committing it to memory.
The Ribbon can change its default display in several ways and with several options. An icon labeled “Ribbon Display Options” is at the upper right corner of your screen. Click on it brings up a drop-down menu with three options:
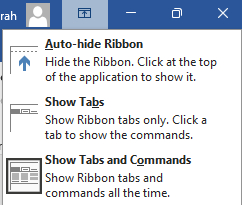
- Ribbon auto-hide: This option conceals the Ribbon and all its tabs and commands by default. When the option is checked, clicking on the top portion of the Word screen is the sole way to bring up the Ribbon and its contents.
- Show Tabs: This option preserves the Ribbon’s tabs while hiding all the commands beneath them. You can display commands by clicking on a tab, using the Ctrl + F1 keyboard shortcut, or choosing the “Show Tabs and Commands” option.
- Show Tabs and Commands: This option allows you to view the Ribbon in its entirety, with all of its tabs and commands always visible.
File menu, backstage section
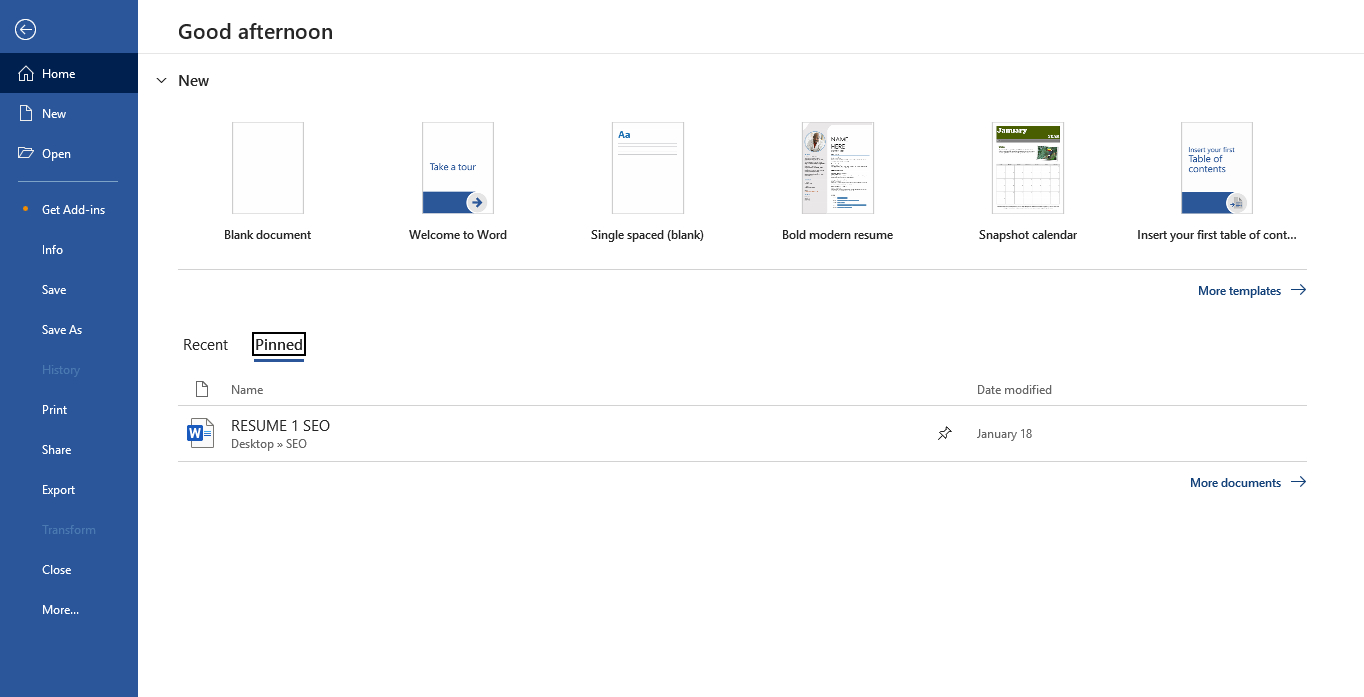
In Microsoft Word and other Office programs, the “backstage” section is what you see when you click the File menu. Here, you get a full-page view of the information and several essential tools to open and save files, print, and share other files instead of a tab with commands lined up.
You may also view details about the document you are working on using the File menu. This entails viewing the file size, owner, creation date, last modification date, and many other details. In addition, you can add password security, verify that the file is accessible, and modify the permissions of other editors as the file owner.
Utilize the “Tell Me” function.
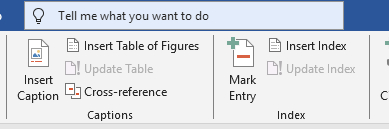
Despite Microsoft Word’s constant accolades for being user-friendly, there are times when you may need help to accomplish something or just cannot locate the command you require. Microsoft addressed this problem by introducing the “Tell me what you want to do” bar.
The Tell Me feature is a search bar that interprets your query and presents potential instructions you could use to complete a task. For instance, the functionality will provide pertinent tools like Themes and Styles if you type in “format my document.” In the same way, you can search for particular commands. Type “envelope” into the Tell Me column and the appropriate tool will appear if you don’t know where to start.
Without question, this is an excellent resource for novice Word users and a time-saver for more seasoned users. Use the handy Tell Me to search instead of trawling around the Ribbon. It even keeps track of your past searches, which expedites the use of repetitive commands even more.
Real-time collaboration
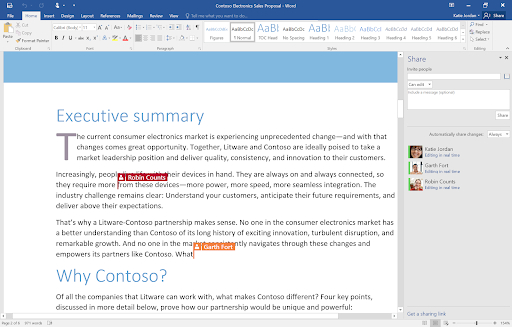
With Microsoft Word’s 2016 update, real-time collaboration was added. It makes it possible for groups to collaborate on the same document simultaneously. All co-editors may see changes as they happen in real-time, which facilitates structured collaboration. The cursor of each individual editing the page has been allocated a distinct color for easy identification.
Additionally, you can interact with those who are modifying your document. You can initiate a conversation, send an email, make a phone call, or use Skype to communicate with the person editing once you click on their name. This makes it possible to collaborate and communicate in a highly efficient manner.
- A word of advice: When working with others on a document, make sure you are always connected to the internet with speed. Your chances of experiencing lag are very significant if your connection is unstable. Not only will you not be able to see edits in real-time, but others will be able to see your edits more slowly.
Utilize themes to structure information well.
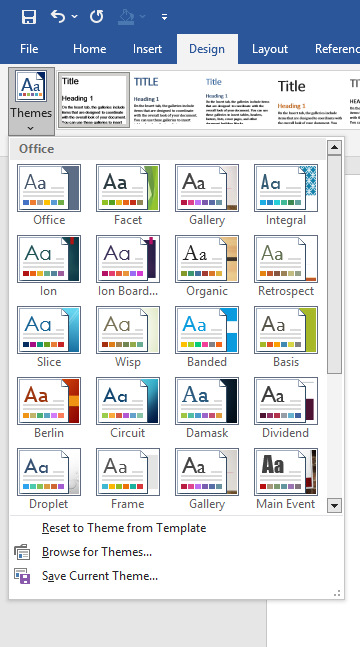
Are you sick and weary of formatting papers by hand every time you create one? Word comes with Themes that you may use to quickly change entire documents without compromising style or professionalism. A pre-made collection of formatting options, such as colors, various fonts for the body and heading text, and theme effects for the lines and fills, is called a document theme.
Many themes are pre-installed in newer Word versions, but you can also make your own, download new ones, or edit a current theme to save it as a separate file. The Design tab provides access to themes.
Put in a placeholder text.
Placeholder text is an excellent tool for quickly filling a document with composition or design instead of content. Although you may always look for placeholder text online, you can just give Microsoft Word a command to generate a specified amount of placeholder text automatically.
The following three options can be used to add placeholder text to Word:
- For the help information text, type =rand(1,2). These are written materials taken directly from Word’s help files, so you may rapidly add English placeholder text to your project.
- You can include traditional Lorem Ipsum content in your paper by typing =lorem(1,2). This is helpful if you want to see the future composition or design of the file rather than the content itself.
- You may get a repeated text version of the well-known quick brown fox pangram by typing =rand.old(1,2).
By adjusting the numbers enclosed in parenthesis, you can alter the amount of text added to your page. The second number is the number of sentences generated, and the first number is the number of paragraphs you want. Thus, consider it as follows: =lorem(paragraph, sentence). You can generate three paragraphs of Lorem Ipsum text with seven sentences each by typing in =lorem(3,7).
Read Comfortably.
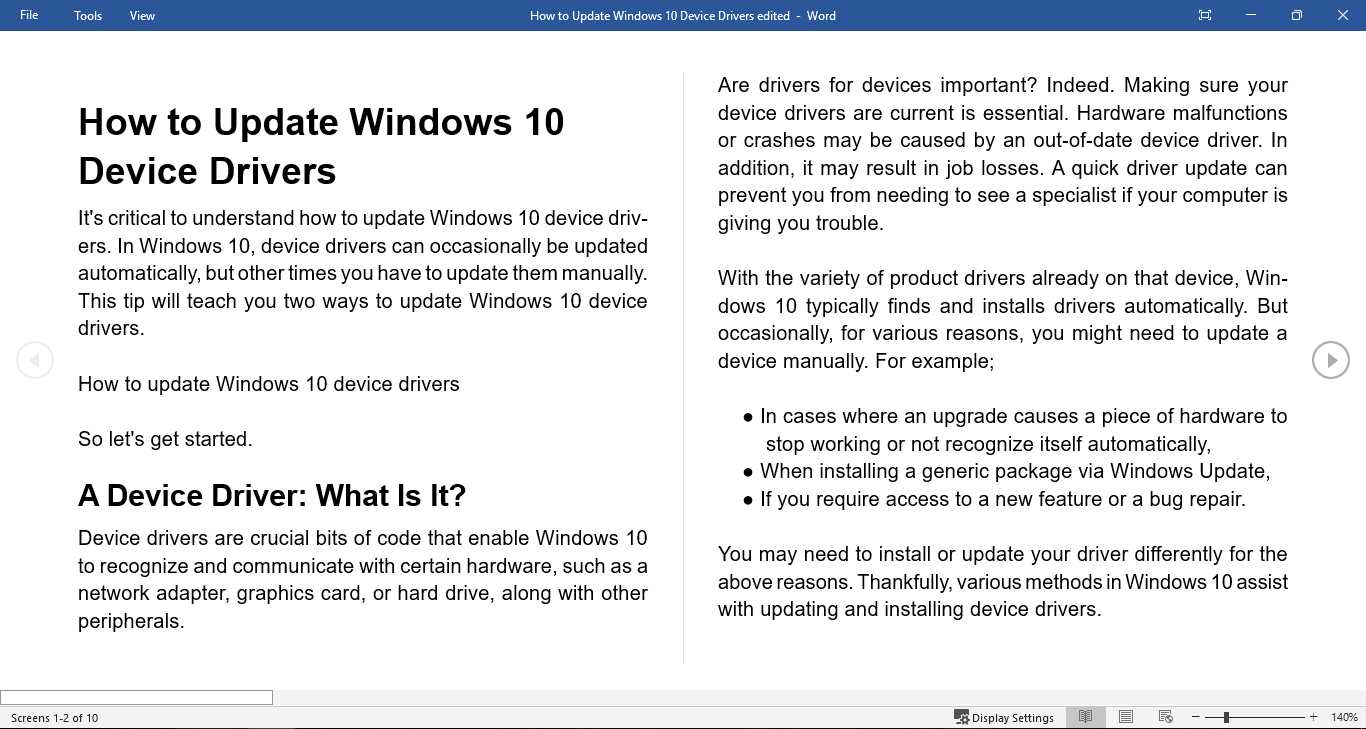
Everybody has to read a lengthy document occasionally, which gets harder and harder to bear. The new book-like view lets you read a file from a different angle and enhances your reading experience. Turn the pages into a book-like display using your finger or the mouse pointer and scrollbar on a touch-enabled device.
Additionally, Microsoft cleared the read-mode of unwanted clutter and distractions from your screen. Scanning and reading your papers is made simple with side-by-side viewing, and the toolbar disappears when not in use to give the interface a more straightforward, book-like feel.
Practical Word shortcuts that are essential to know
We’ve chosen to conclude our guide sheet with a list of some of the most useful Microsoft Word keyboard shortcuts that can help you work more quickly:
| Command | Action |
| Ctrl + Enter | Insert a page break. |
| Ctrl + L | Align your text to the left |
| Ctrl + R | Align your text to the right |
| Ctrl + J | Justify your text |
| Ctrl + B | Make text bold. |
| Ctrl + I | Make text italic. |
| Alt + F | Go to the File tab. |
| Ctrl + N | Create a new document |
| Ctrl + O | Open a document |
| Ctrl + S | Save a document |
| Ctrl + Shift + D | Double underline text |
| Ctrl + U | Underline text |
| Alt + H | Go to the Home tab |
| Ctrl + E | Align your text to the center |
| Alt + N | Go to the Insert tab |
| Alt + G | Go to the Design tab |
Does Microsoft Word allow you to double-underline?
Indeed. To doubly underline a text, highlight it and press Ctrl + Shift + D. Use the shortcut once more to reverse the action. Simple!
In Microsoft Word, how do you underline without text?
Point the pointer at the desired underlining location. Press Ctrl + Shift + Spacebar after that. This procedure can be repeated for each blank space you wish to add to your page.
In Microsoft Word, how can I remove the duplicate underlining?
Press Ctrl + Shift + D in Word to remove the double underlining.