How to Make Columns in Microsoft Word: A Comprehensive Guide
In the realm of document formatting, mastering how to make columns in Microsoft Word is a fundamental skill. Columns offer a structured layout, enhancing readability and visual appeal. In this step-by-step guide, we’ll explore how to make columns in Microsoft Word effortlessly.
Understanding the Basics
Before diving into the process, let’s grasp the basics of why and when you might want to use columns in Microsoft Word.
Why Use Columns In Microsoft Word?
Columns provide a versatile layout option, ideal for various document types, such as newsletters, brochures, or reports. They allow you to organize content efficiently, making it more digestible for readers.
When to Use Columns In Microsoft Word
Consider using columns when you want to:
- Create a newsletter with multiple sections.
- Design a brochure for a visually appealing presentation.
- Format a report or document with a more structured appearance.
Step-by-Step Guide: How to Make Columns in Microsoft Word
1. Open Microsoft Word
Launch Microsoft Word and open the document you want to format with columns. If you’re starting a new document, you can do so by selecting “New” and choosing a blank document.
2. Select the Text
Highlight the text you want to format into columns. If you want the entire document in columns, you can skip this step.
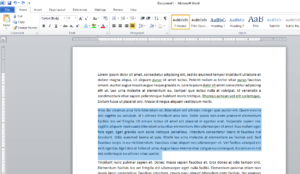
3. Navigate to the “Layout” Tab
Find the “Layout” or “Page Layout” tab in the Word ribbon. This tab contains the tools you need for formatting your document.
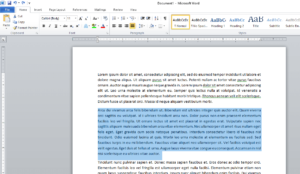
4. Locate the “Columns” Button
Look for the “Columns” button; it typically appears in the Page Setup group. Click on it to reveal a dropdown menu with column options.
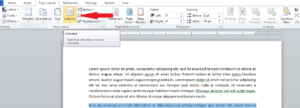
5. Choose the Number of Columns
In the dropdown menu, select the number of columns you want for your document. You can choose from predefined layouts or opt for a custom setup.
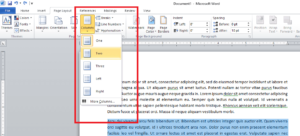
6. Adjust Column Width and Spacing
If you selected a custom setup, you can further adjust the column width and spacing. Experiment with these settings to achieve the desired look for your document.
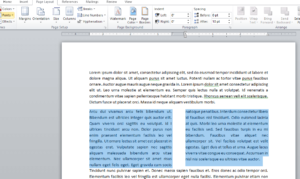
7. Review Your Document
After applying columns, review your document to ensure the formatting meets your expectations. Make any necessary adjustments.
Step-by-Step Guide: How to Make Three or More Columns
in Microsoft Word
1. Open Microsoft Word
Launch Microsoft Word and either open an existing document or start a new one where you want to apply multiple columns.
2. Select the Text
Highlight the text you want to format into three columns or more. If you want the entire document in columns, skip this step.
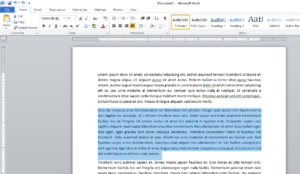
3. Navigate to the “Layout” Tab
Locate the “Layout” or “Page Layout” tab in the Word ribbon at the top of the interface. This tab houses various formatting options.
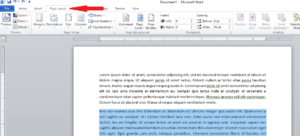
4. Find the “Columns” Button
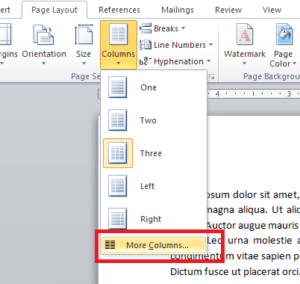
Look for the “Columns” button within the Page Setup group. Click on it to reveal a dropdown menu containing column layout options.
5. Choose “More Columns…”
Select “More Columns…” at the bottom of the dropdown menu. This will open a dialog box with advanced column formatting options.
6. Set the Number of Columns
In the “Columns” dialog box, specify the number of columns you desire. If you want three columns, enter “3” in the provided field. Adjust other settings as needed.
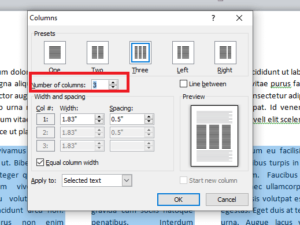
7. Adjust Width and Spacing
Fine-tune the width and spacing settings according to your preferences. Microsoft Word provides options for controlling the width of columns and the spacing between them.
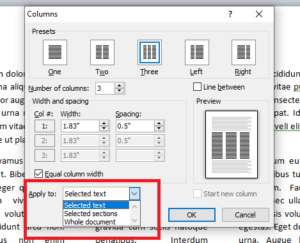
8. Apply to: Entire Document or Selected Text
Choose whether you want to apply the column formatting to the entire document or just the selected text. This option allows for flexibility in your layout.
9. Click “OK”
Once satisfied with your settings, click the “OK” button to apply the multiple columns to your document.
10. Review and Adjust
After applying the columns, review your document to ensure the formatting meets your expectations. Make any necessary adjustments to achieve the desired layout.
Troubleshooting Tips
Columns Not Formatting Correctly?
If you encounter issues with column formatting, consider the following troubleshooting tips:
- Check for unwanted section breaks.
- Ensure there are no manual column breaks interfering with the layout.
- Review the document’s overall formatting for any conflicting styles.
Step-by-Step Guide: Making a Column Break in Microsoft Word
1. Open Microsoft Word
Launch Microsoft Word and either open an existing document or start a new one where you want to insert a column break.
2. Navigate to the Layout Tab
Locate the “Insert” tab in the Word ribbon at the top of the interface. This tab contains various elements you can insert into your document.
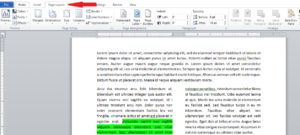
3. Find the “Breaks” Option
Within the “Layout” tab, look for the “Breaks” option. Clicking on it will reveal a dropdown menu with different types of breaks.
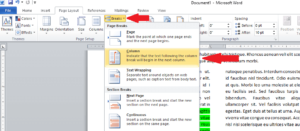
4. Choose “Column”
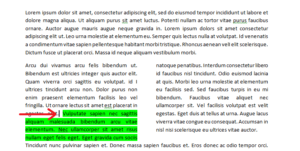
From the “Breaks” menu, select “Column.” This action tells Word to start the next part of your text in the next column.
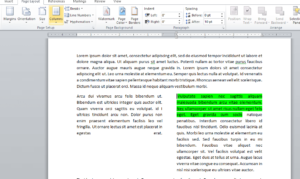
5. Verify the Column Break
Once you’ve chosen “Column,” you’ll notice a break line in your document, indicating the position where the column break will take effect.
6. Adjust as Needed
If your document has multiple sections or columns, you can repeat the process to insert additional column breaks. Adjust the breaks as needed to achieve the desired layout.
Troubleshooting Tips
Missing Break Line?
If you don’t see the break line after inserting a column break, consider these troubleshooting tips:
- Ensure that your document is in “Print Layout” view. The break line might not be visible in other views.
- Check for existing section breaks that might interfere with the column break.
Conclusion
Mastering how to make columns in Microsoft Word is a valuable skill for creating visually appealing and well-organized documents. Whether you’re designing a professional report or a creative brochure, columns can elevate the presentation of your content. Follow this comprehensive guide, experiment with different layouts, and enhance the visual impact of your Word documents.
Now that you’ve learned how to make columns in Microsoft Word, apply this skill to improve the structure and readability of your documents effortlessly. Elevate your document formatting game with Microsoft Word’s powerful column features.