Within the search box, input “Command Prompt” or “cmd”.
Looking to run the System File Checker (sfc /scannow) but encountering the “Windows Resource Protection could not start the repair service” error message? Here’s how to fix it. The System File Checker is a widely trusted tool relied upon by countless individuals to recover lost or damaged files and tackle system-wide concerns effectively. It can identify and automatically repair system files that are causing problems for your computer. However, what should you do if the feature that is supposed to resolve your problems also needs to be resolved?
When attempting to run the “sfc /scannow” command, users have been experiencing receiving another error message in return: Some users have reported receiving an error message when attempting to execute the “sfc /scannow” command. The error message states that “Windows Resource Protection could not start the repair service”. To resolve this and run the System File Checker properly, there are a few things you can do.
Why Does not the SFC Scan Function?
This is because the TrustedInstaller (Windows Modules Installer) service prevents your System File Checker from working. This essential function aids in the installation, modification, and removal of different apps from your system. In order to stop outside parties from changing or erasing your system files, it also “owns” them.
You still need to use the SFC scan since corrupted system files might still cause problems. The Windows Resource Protection (WRP) files and registry keys required for the proper operation of the SFC scan are fully accessible to TrustedInstaller.
When the “sfc /scannow” command is run, this service launches on demand. The scan will not recover any missing or corrupted WRP files if the service has been turned off entirely.
Most often, this problem occurs in Windows 7, but it can also occur in Windows 8, and even in the most recent version of Windows 10.
How Can I Resolve the “sfc /scannow” Issue? Fix Windows Resource Protection: The repair service could not start.
If you are having trouble getting the System File Checker to work and checking your device for missing or corrupted files, there are a few different ways you can get help.
Method 1: Launch the TrustedInstaller, the Windows Modules Installer.
Starting the necessary service by hand is the simplest solution. It is crucial to set up the Windows Modules Installer so that it launches each time the SFC scan is attempted. To assist you with this setup, follow the steps listed below.
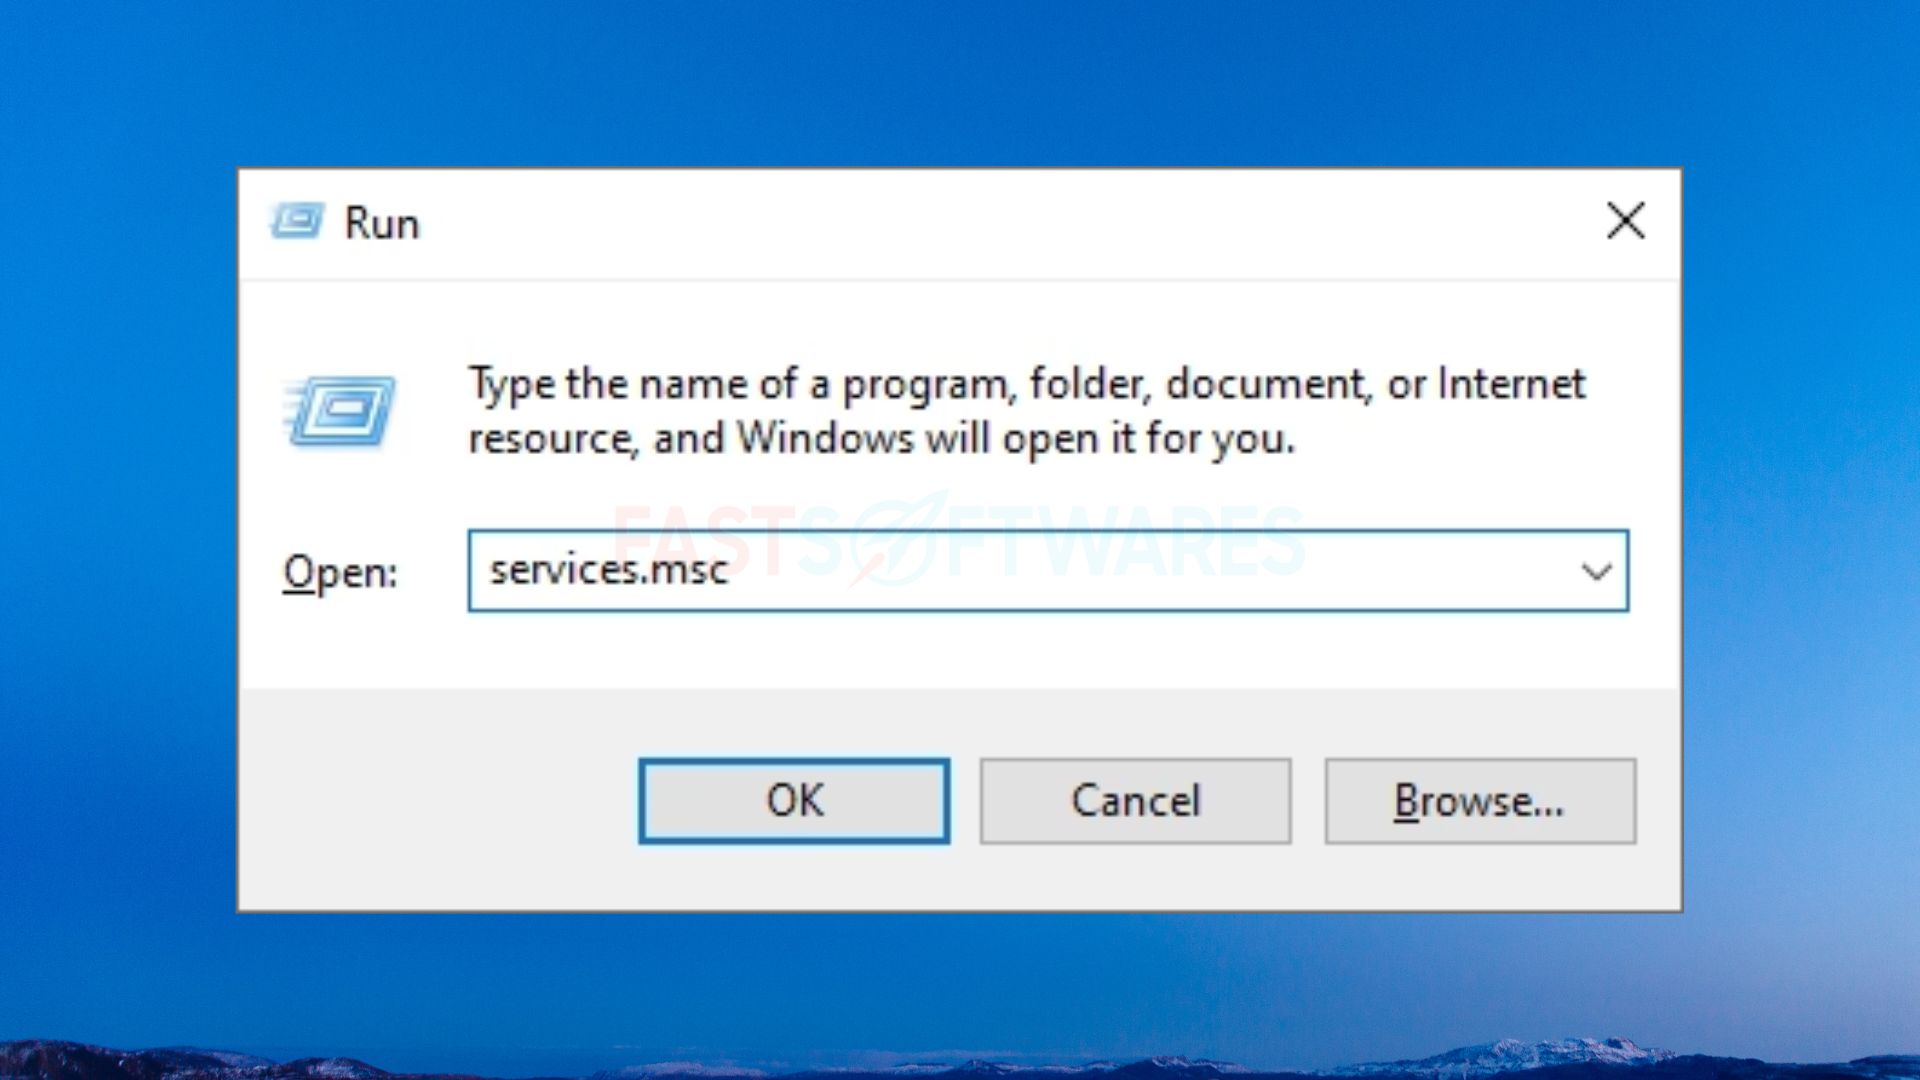
1. Using the keyboard, press the Windows + R keys. The Run utility will launch as a result.
2. After entering services.msc, press the OK button. The Services window will open as a result, and it may take some time to fully load.
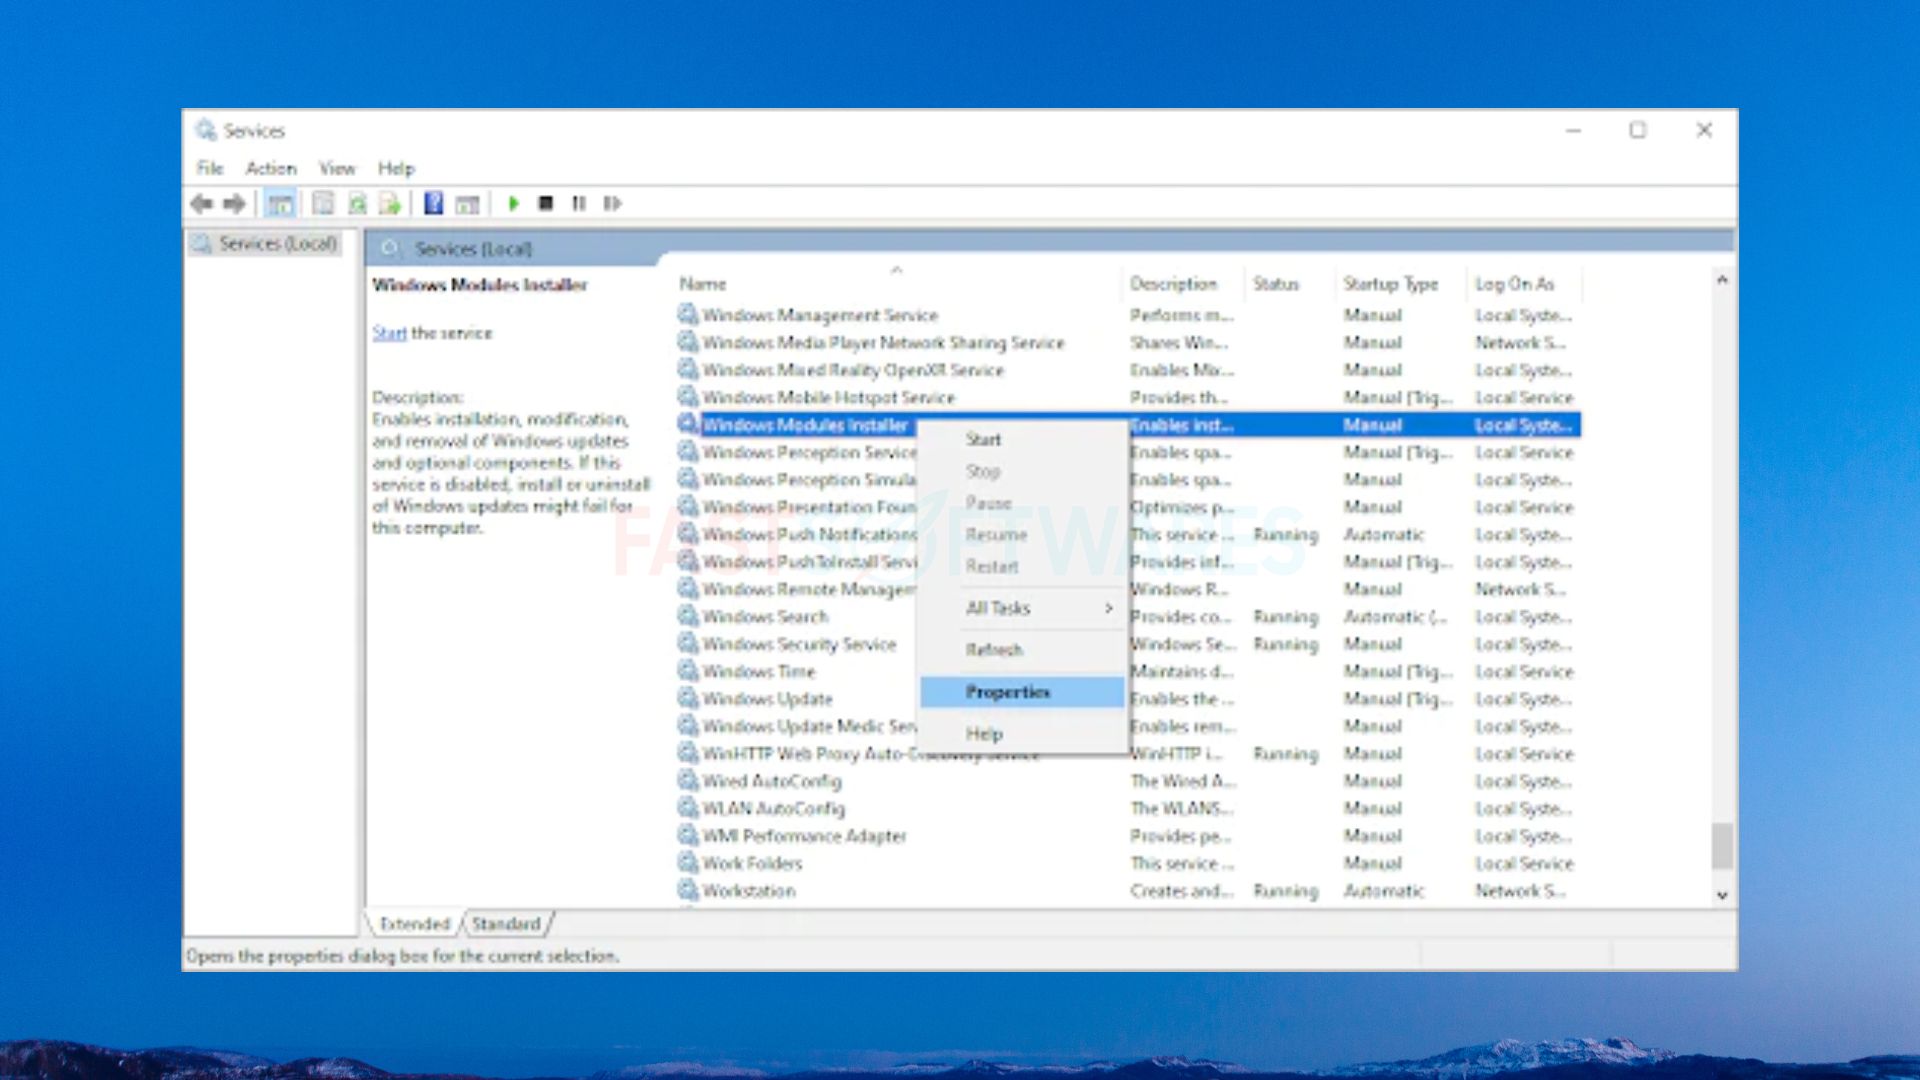
3. To select Properties for the Windows Modules Installer service, you can perform a right-click on it.
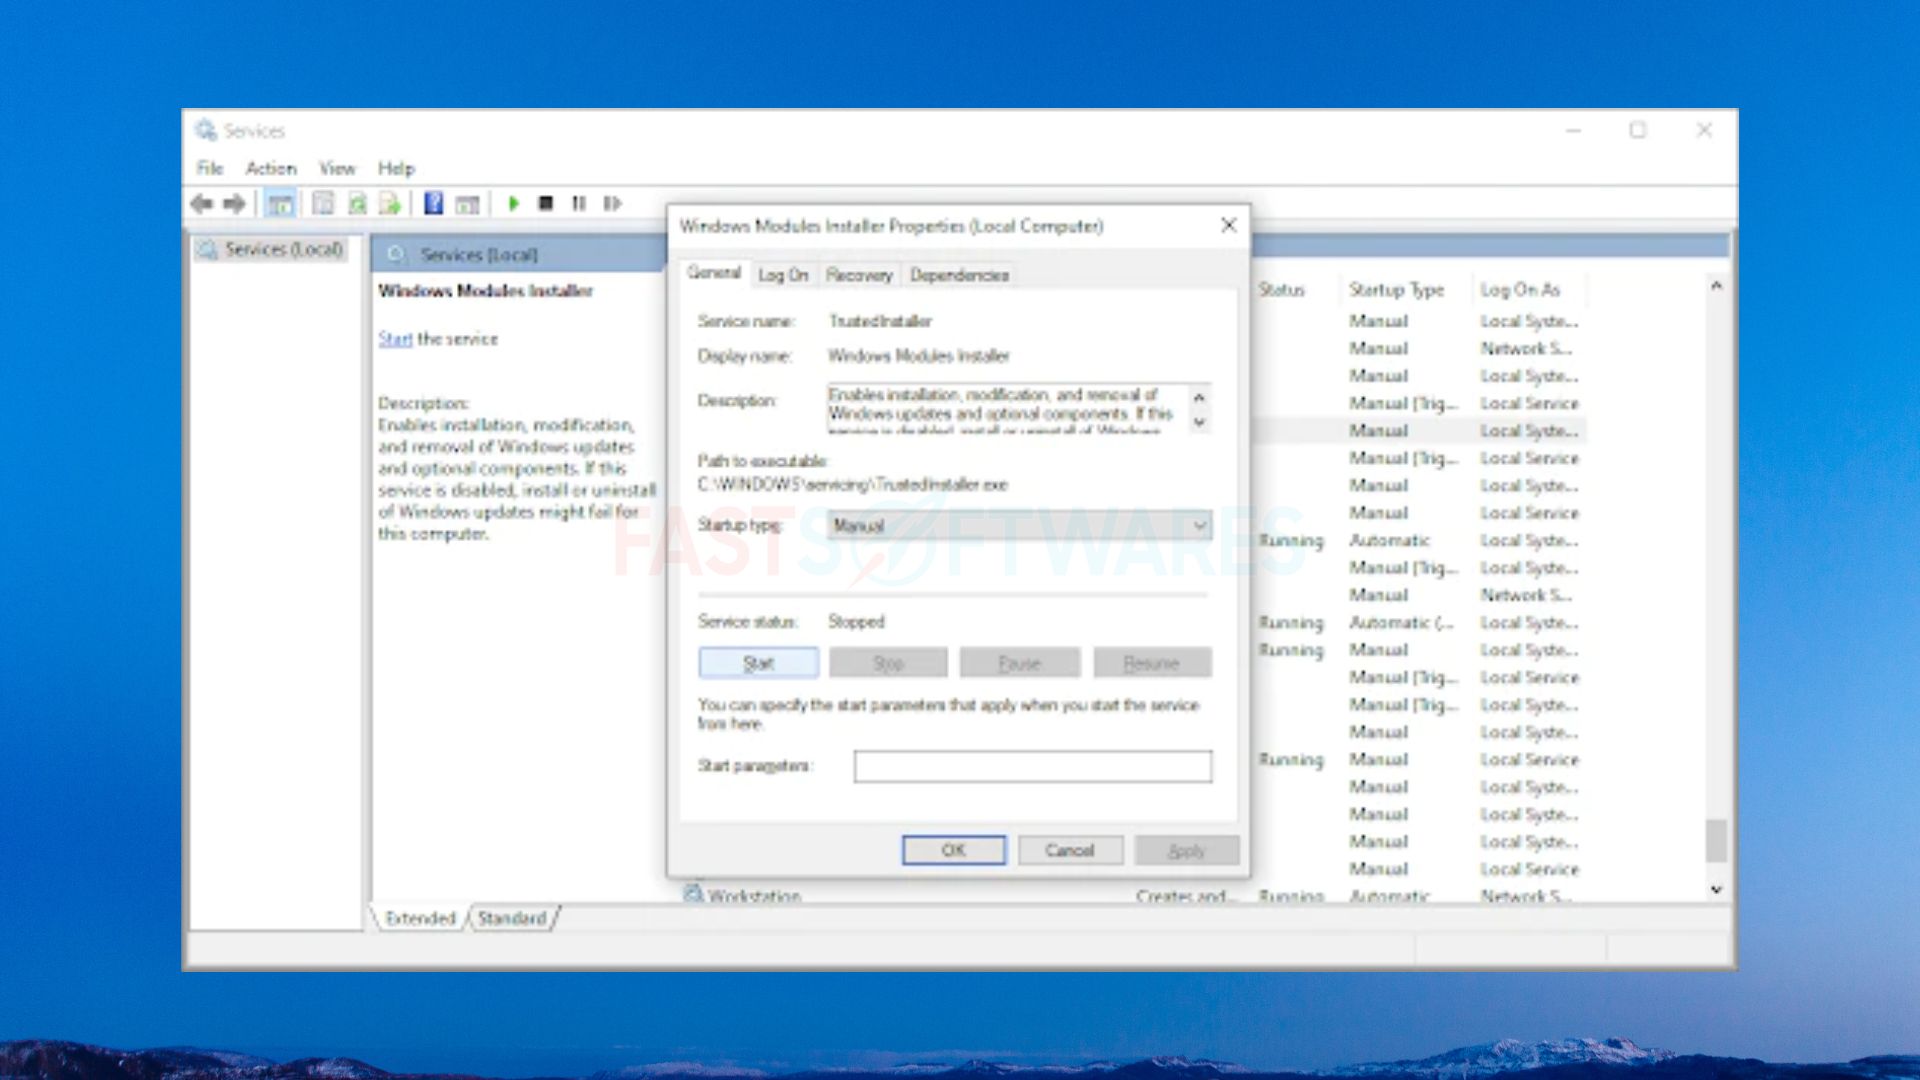
4. Select “Manual” for the Startup type. Click the Start button if the service is not currently operating. button. After selecting Apply, select OK. You ought to be back at the services list now.
5. Once more, try executing the “sfc /scannow” command after closing the Services window. Proceed to the next solution if the scan still fails.
Method 2: Make Use of the Input Command Prompt
Though it is executed in the Command Prompt, this method is basically the same as the last one. This approach essentially mirrors the first method but is executed within the Command Prompt interface. Since you require administrator permissions to perform the adjustment, there is a chance that this approach will work.
1. To open the search bar in the taskbar, simply click on the magnifying glass icon.Alternatively, you can use the Windows + S keyboard shortcut to open it.
2. In the search field, enter “Command Prompt” or “cmd”. Select Run as Administrator with a right-click on it when you see it in the results.
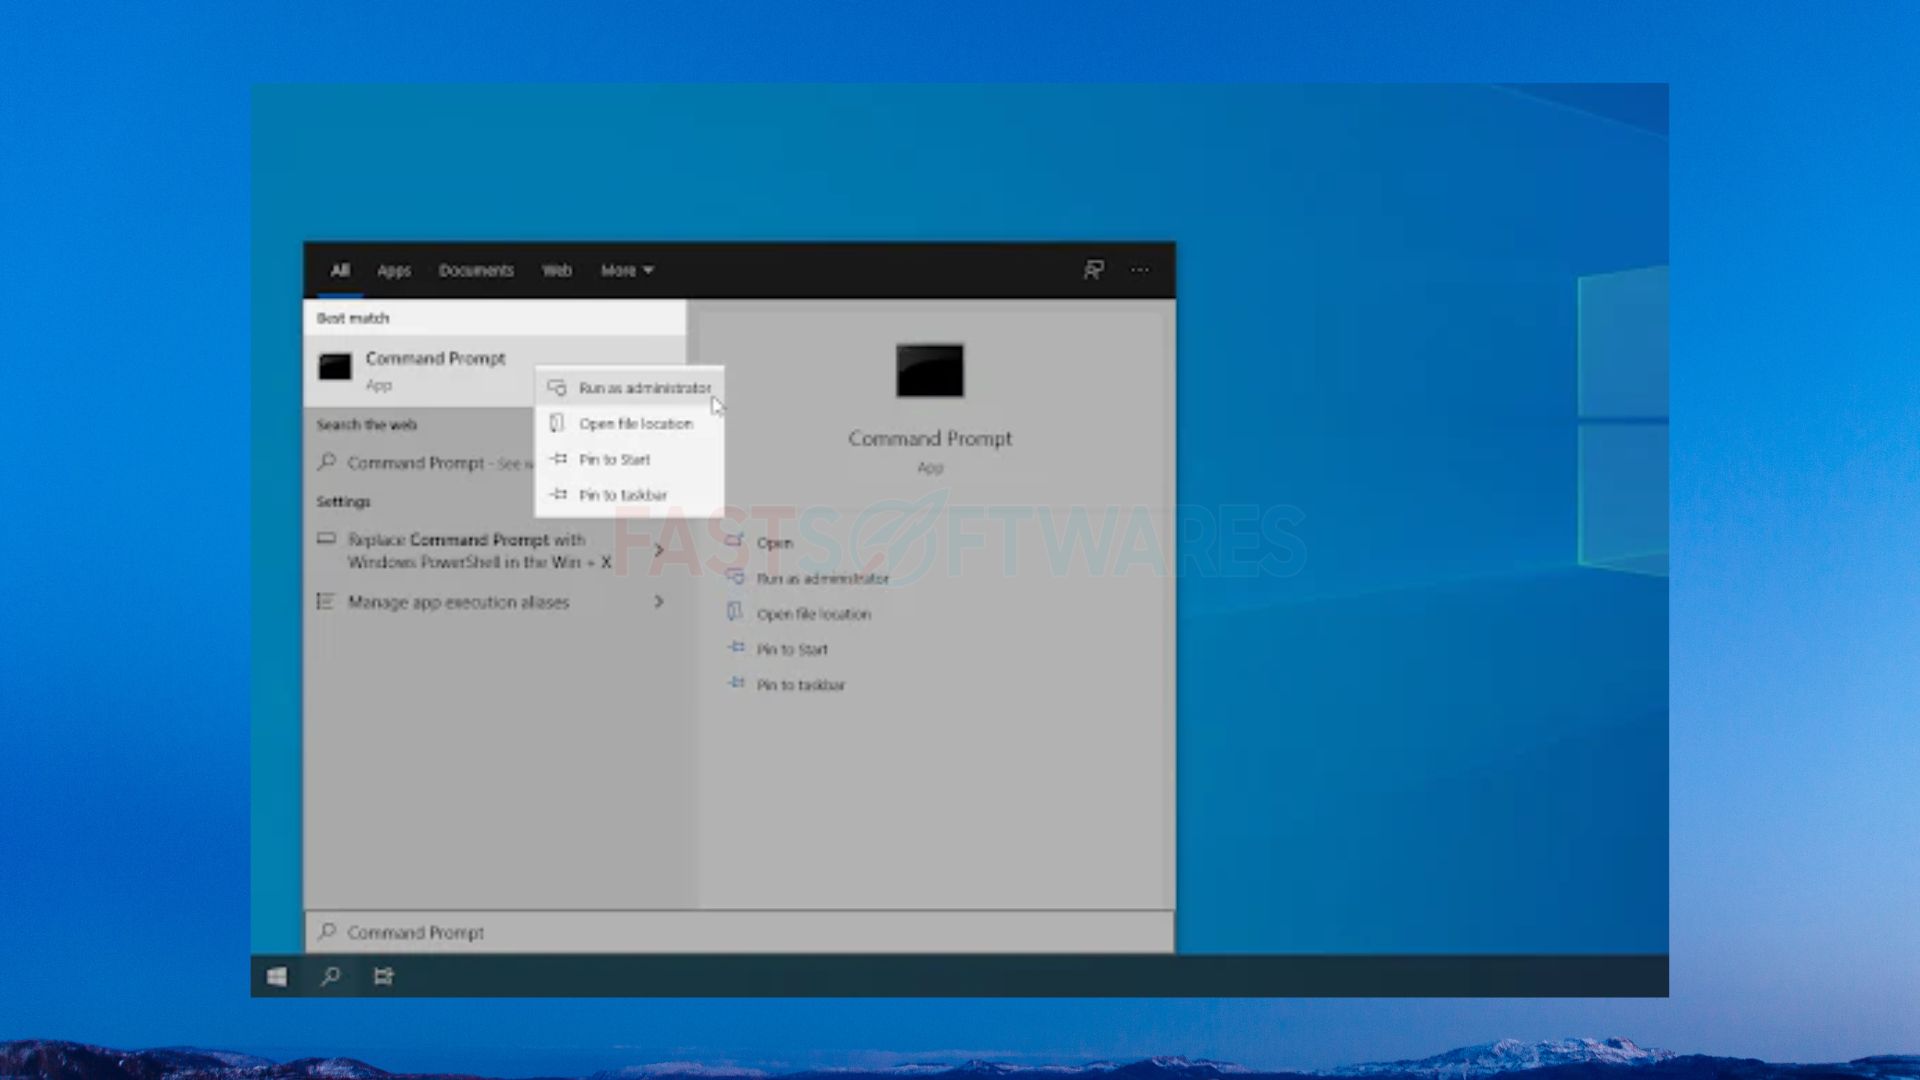
3. If the User Account Control (UAC) asks for permission to run the program with administrator privileges, select Yes to authorize the application to start with administrative access.
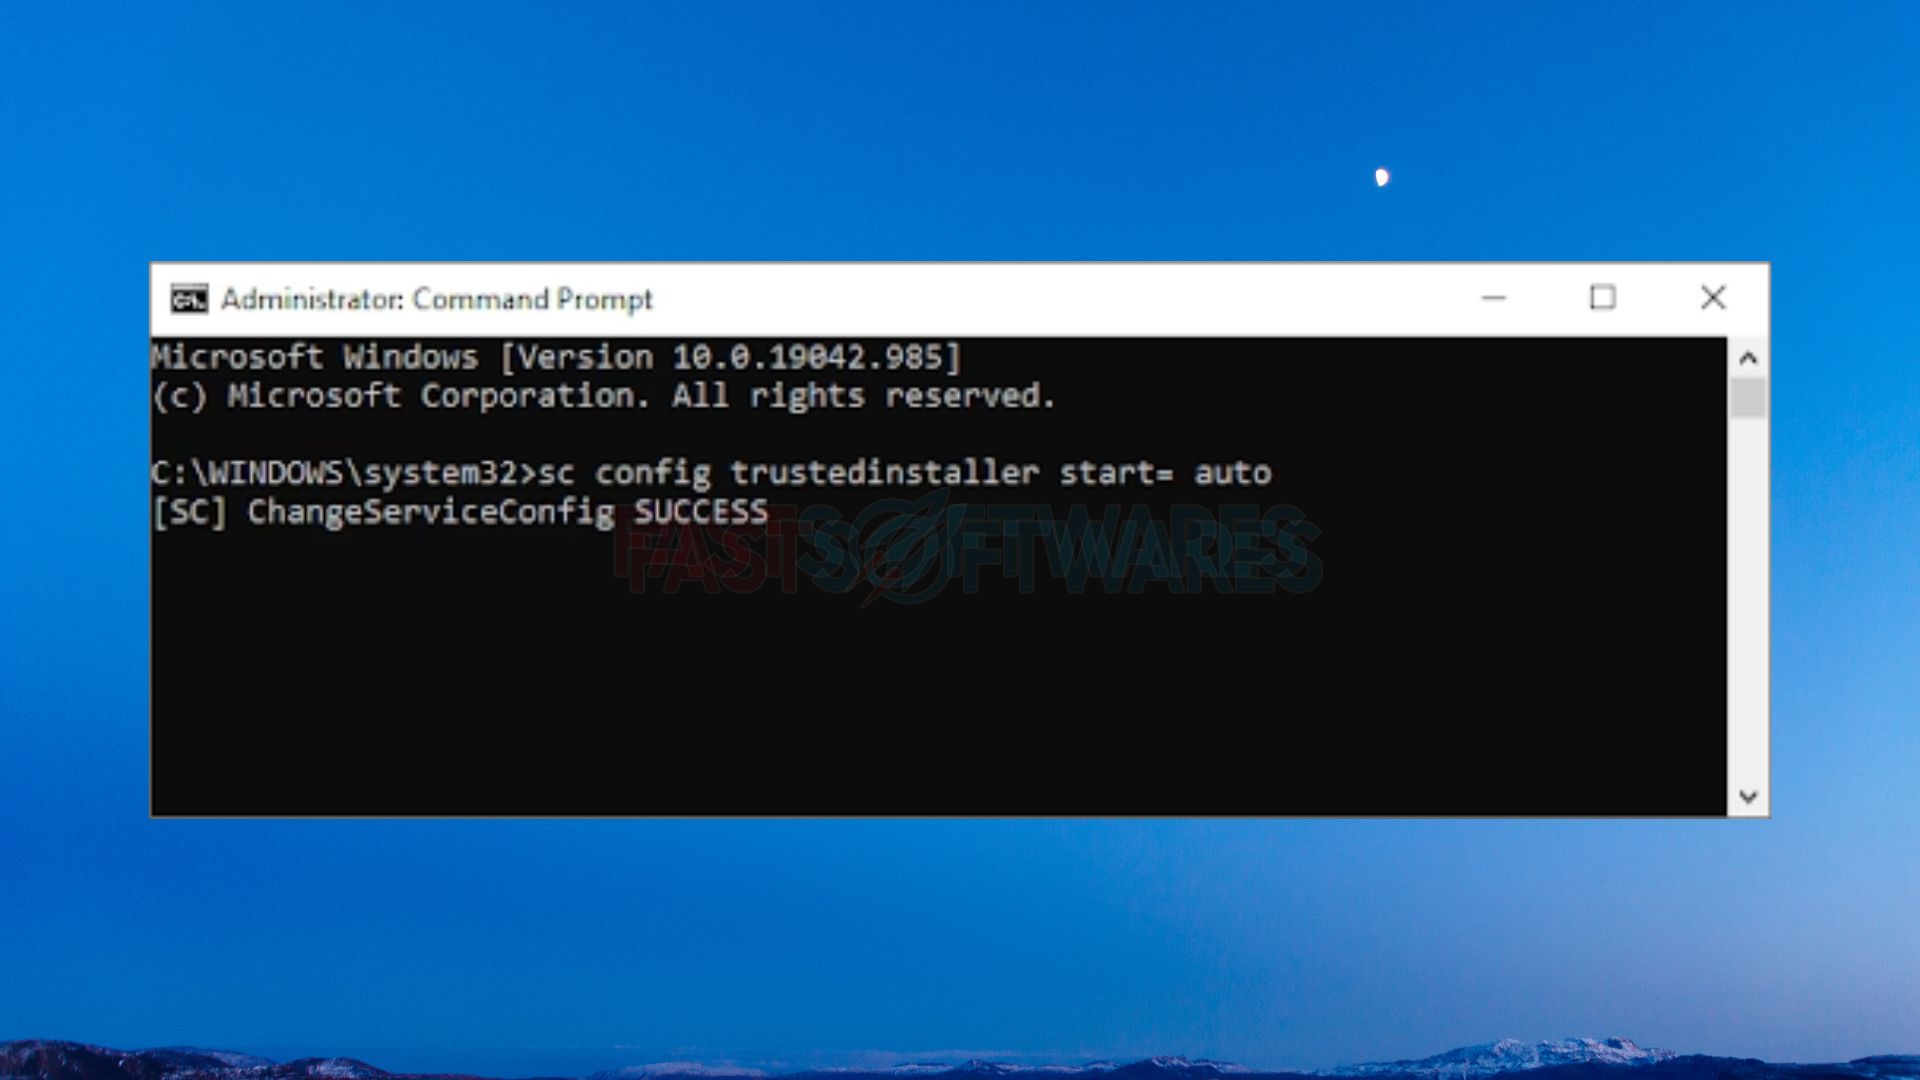
4. Enter this command into Command Prompt: starting=auto sc config trustedinstaller. If successful, SUCCESS message appears.
5. Run the following command after that: net start trustedinstaller. A notification indicating the successful startup of the Windows Modules Installer service ought to appear.
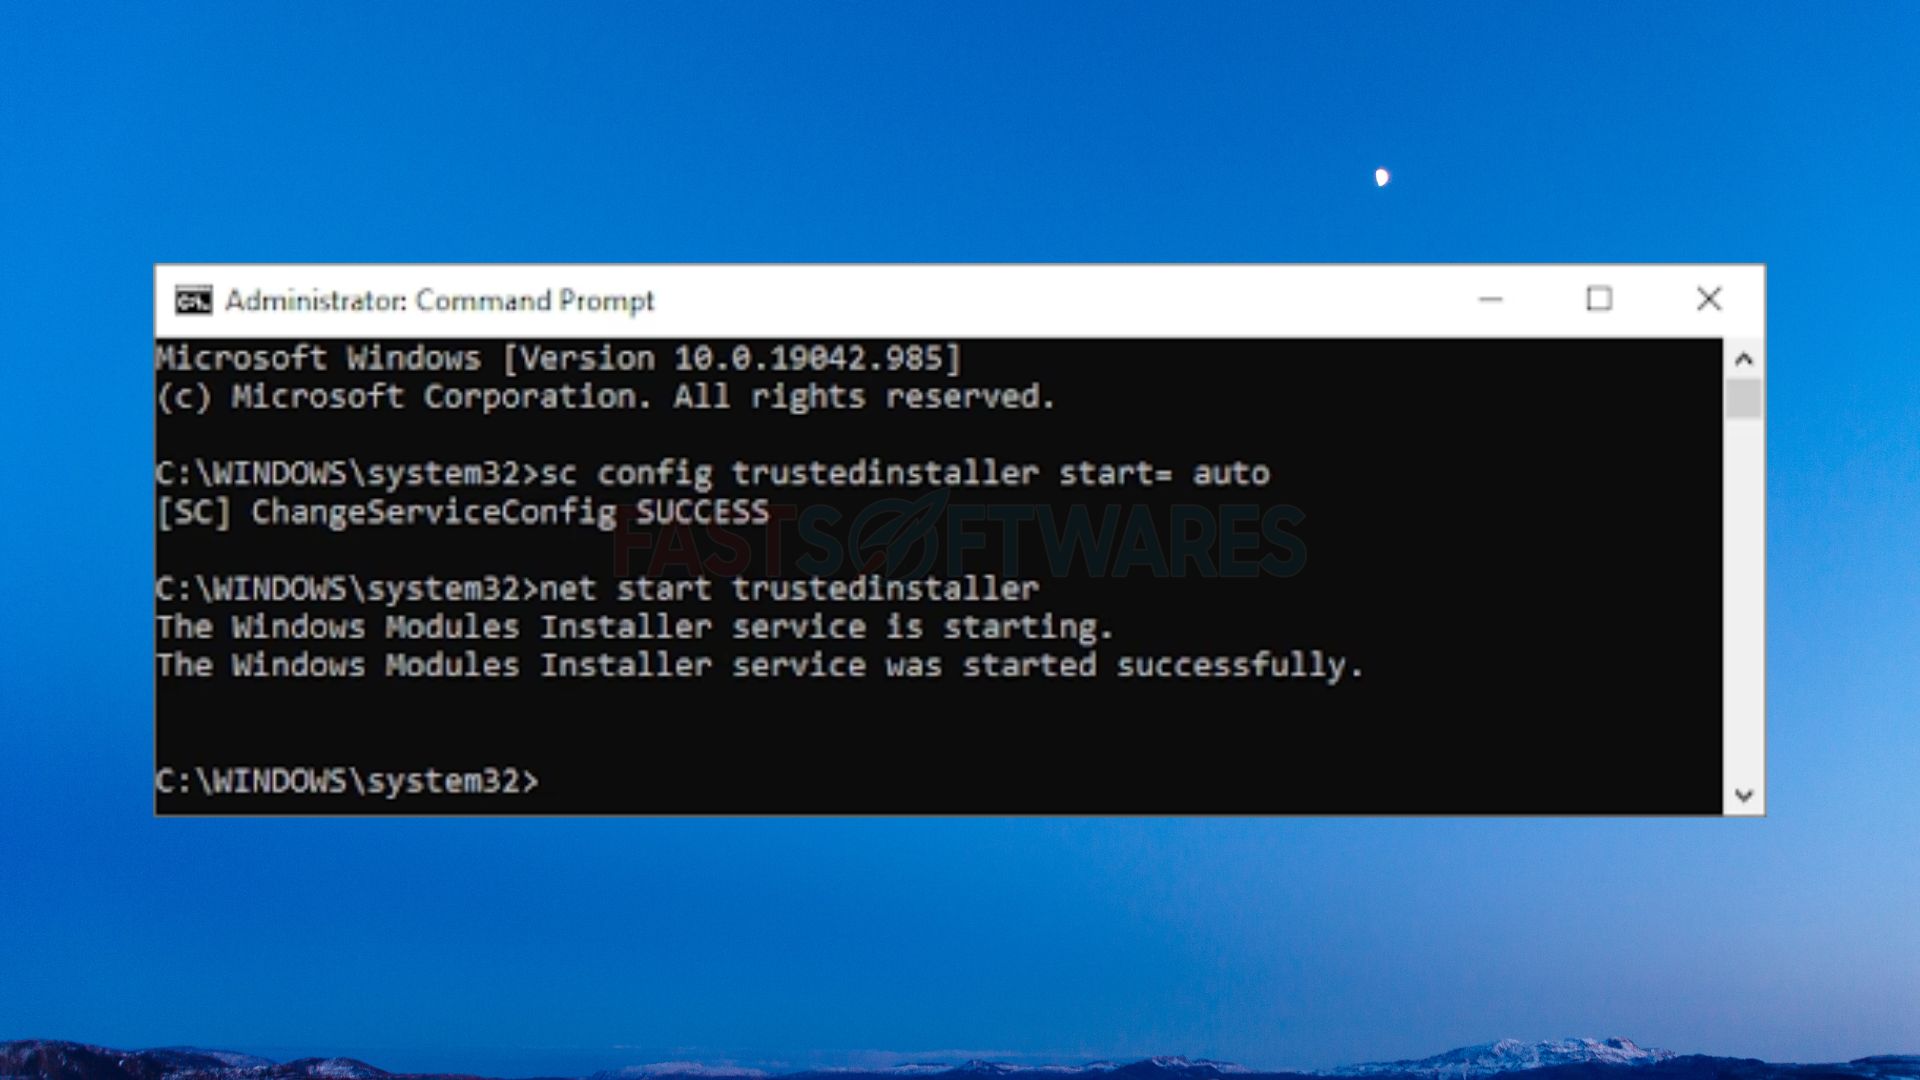
6. You may now try using the sfc /scannow command to launch the System File Checker. If it is still not working, try the other method that is mentioned below.
Method 3: Consider Using Safe Mode to Run the System File Checker
Interference from a service or background application is one potential reason why the System File Checker is not working properly. You could try using the scan command in Safe mode in this situation. When your computer initiates in safe mode, only the fundamental Windows components become operational.
1. Utilizing the keyboard, press the Windows + R keys. Consequently, the Run utility will launch.
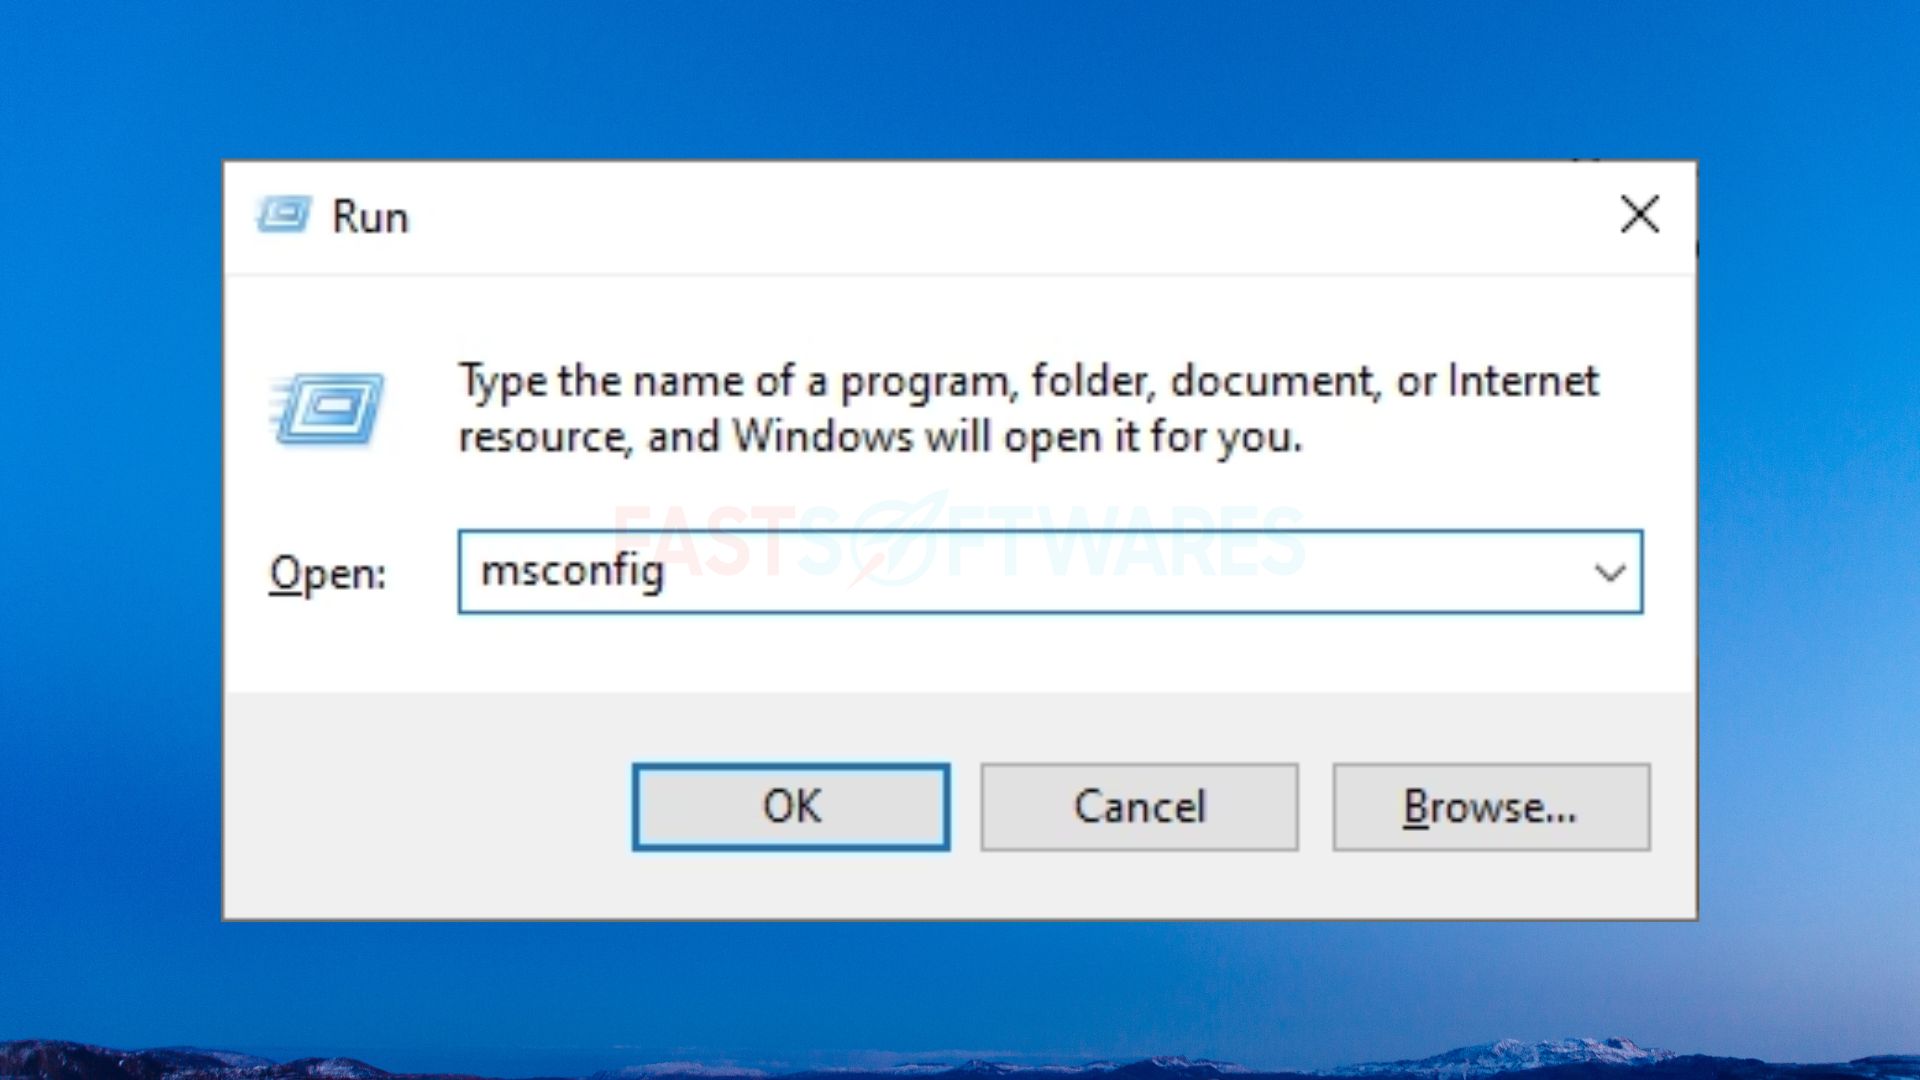
2. Using the keyboard, type “msconfig” without the quote marks. This will cause the System Configuration application to start.
3. Click the Boot tab. After choosing Safe boot and keeping the Minimal boot option, click the OK button.
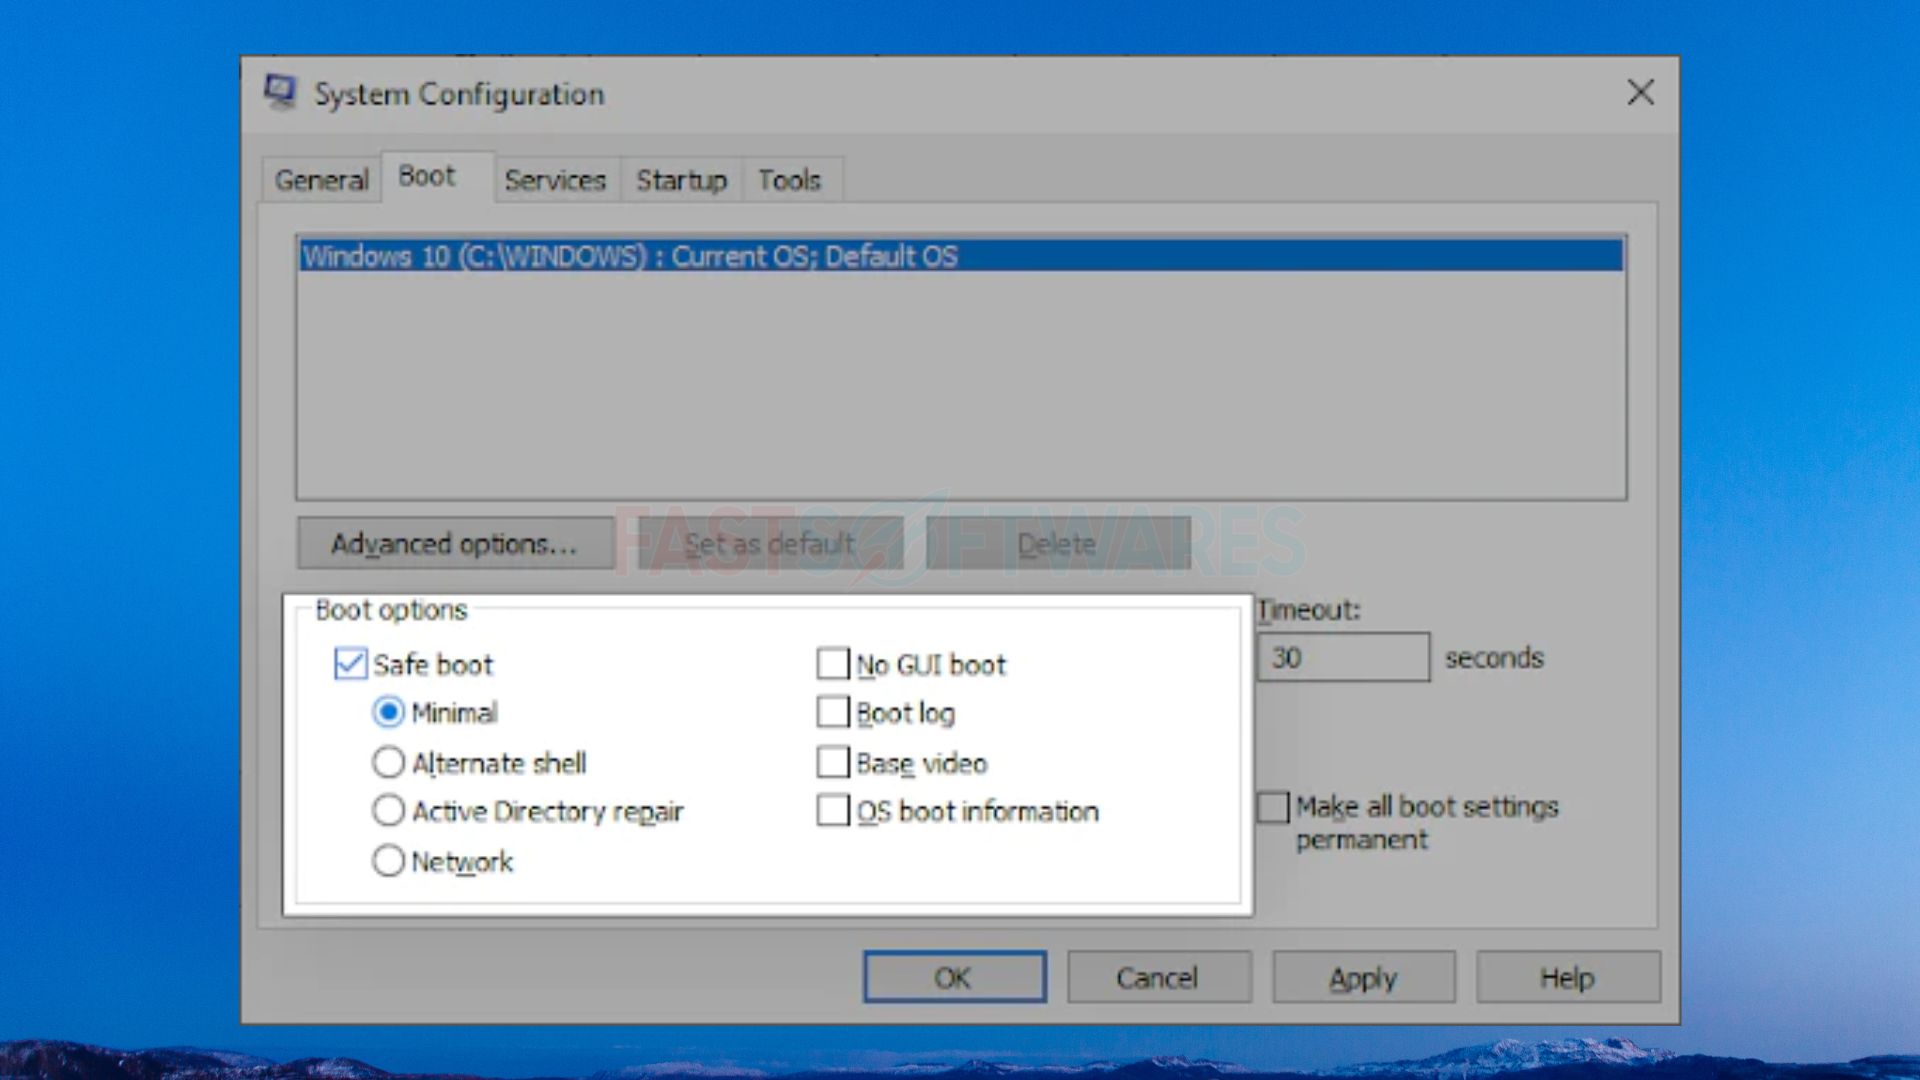
4. Give your machine a restart. When safe mode boots up, just the necessary services should run; no external apps should be opened. Use the Command Prompt’s sfc /scannow command to verify whether the SFC scan is operating properly.
Method 4: Put the DISM Policy into Practice
A few users have reported that the System File Checker can be fixed through the DISM Command Prompt. To resolve any issues that are specifically related to your system image, you can employ the Deployment Image Servicing and Management tool, also known as DISM, is used to re-deploy it. Below are some detailed instructions on how to perform this scan.
1. To open the taskbar search bar, click the magnifying glass icon. As an alternative, you can open it with the Windows + S keyboard shortcut.
2. Type cmd, the command prompt, into the search field. When you find it in the results, right-click on it and choose “Run as Administrator.”
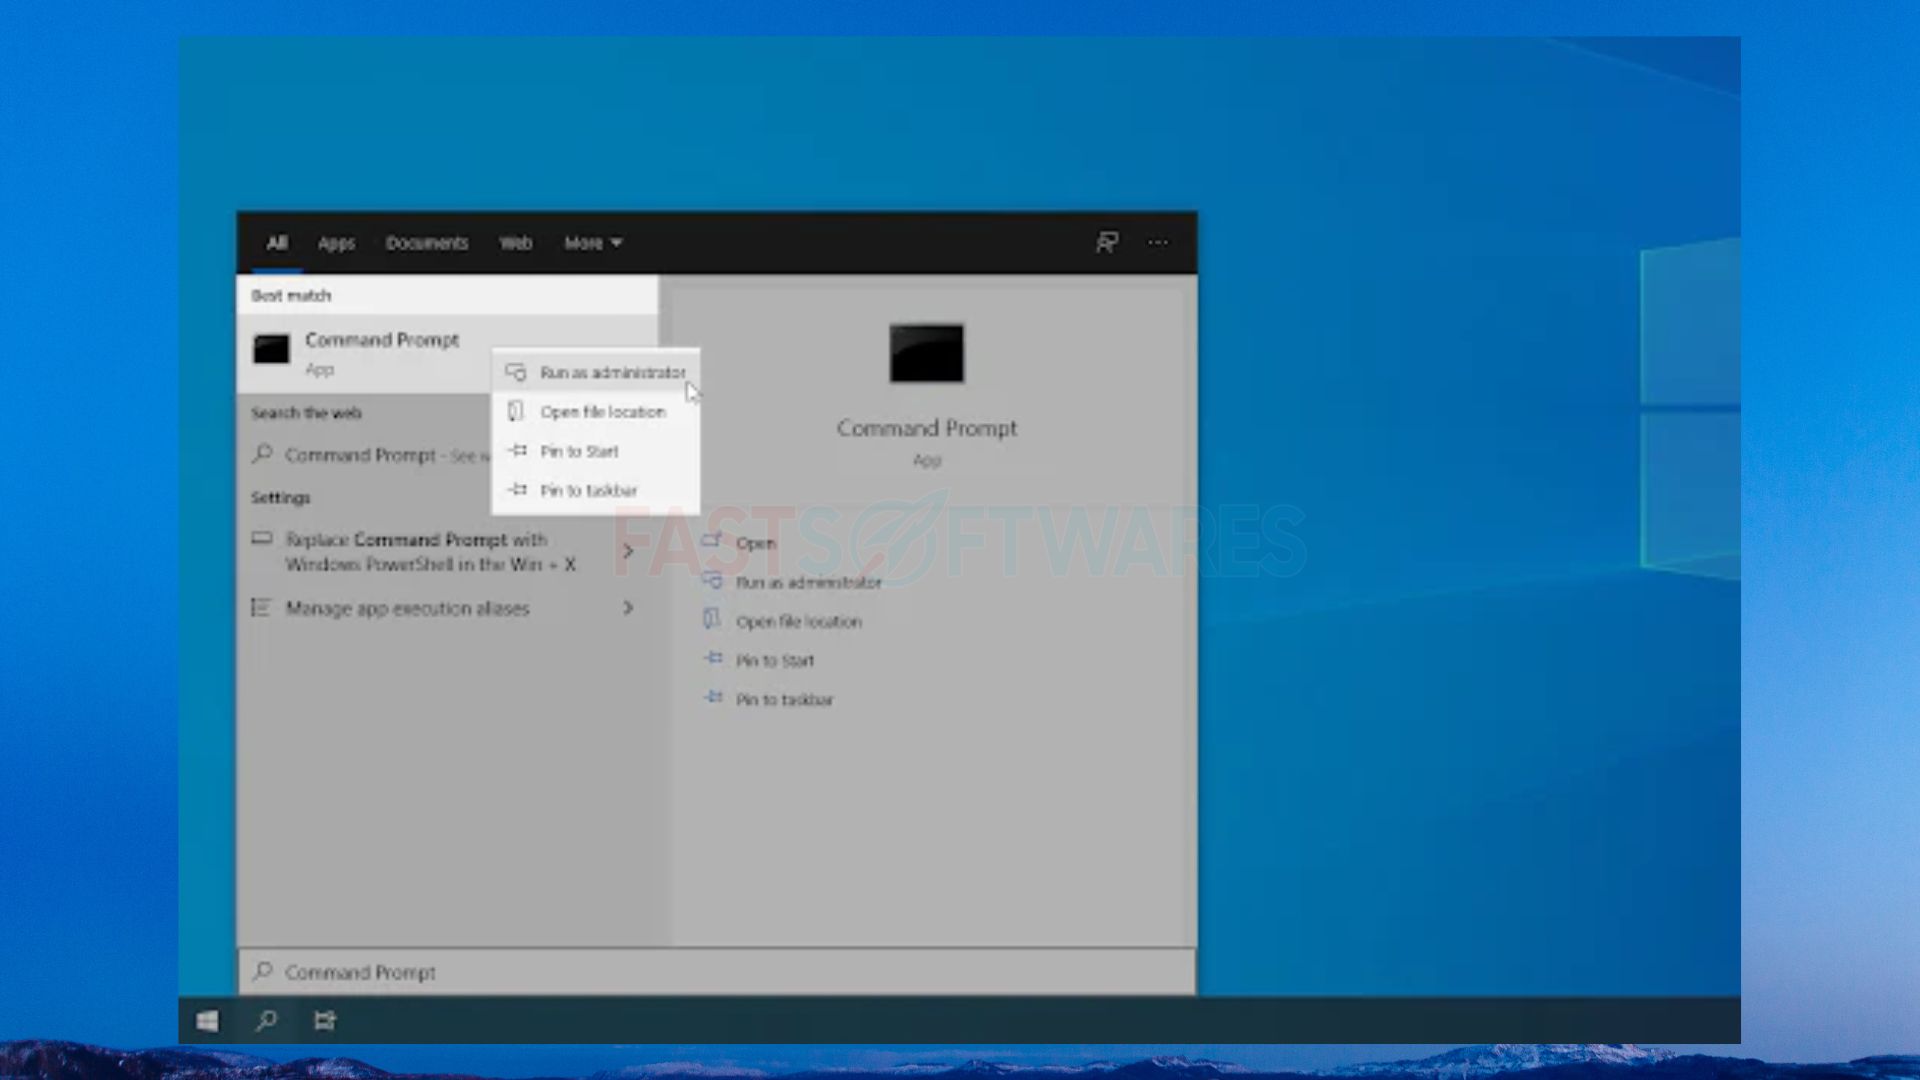
3. Click Yes if the User Account Control (UAC) prompts you to run the program as an administrator.
4. To execute the command, type it into the Command Prompt window and press Enter: Cleanup-Image /DISM /Online /RepairHealth
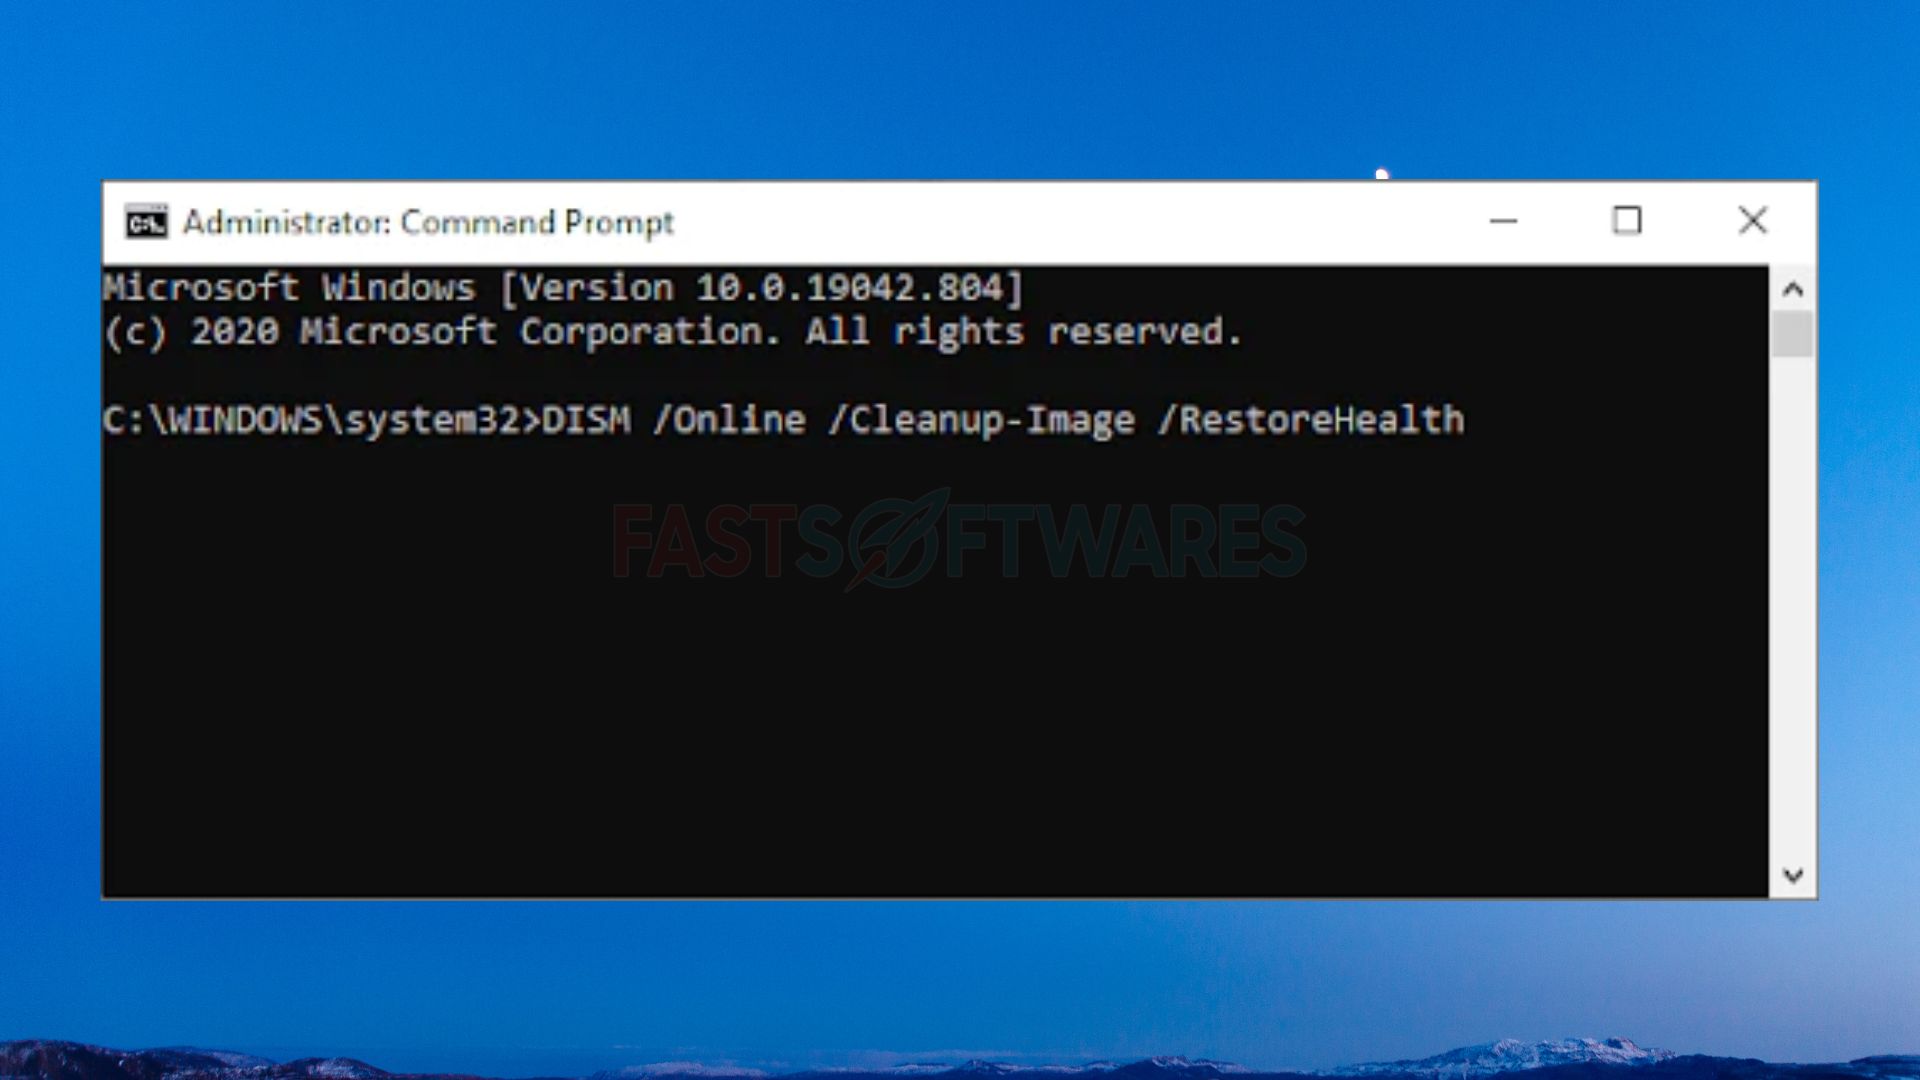
5. Restart your computer after the scan is complete. When you return to the Command Prompt, try running the SFC scan once more to see whether it now works.
Final Words
Our Help Center has hundreds of tutorials. Contact our experts for immediate assistance.
.