


It’s a shared experience when you’re trying to open a particular website and you are prompted with this kind of message “Access Denied. You don’t have permission to access on this server”. Don’t worry. You’re not alone.
Many internet users have encountered this kind of issue that is really disappointing, and there are several reasons why this happens, such as a change of URL or the VPN was disabled by the host. So, if a website finds something is wrong either with your browser or cookies, it then blocks you from opening a particular site.
Fixed: “Access Denied, You Don’t Have Permission to Access on This Server.”
Although you might find this error really upsetting, there are several ways to recover using the following solutions that work for you. This problem usually occurs when your Firefox browser uses a proxy setting or VPN contrary to what is set to your Windows 10 computer. So if you open a particular site, it thinks something is not working right with your proxy or browser cookies. It will then block you from opening it.
You can try fixing this problem with the following options below before you proceed in troubleshooting:
- Clear everything, such as your browser cookies and the history.
- Turn your VPN off and extensions.
- You must also disable proxy.
- Change your VPN service into a premium.
- Reset your browser
Solution #1: Clear Everything About the Website in Firefox
This kind of error usually happens when you use Mozilla Firefox browser, and you can find this helpful button.
- Launch Firefox and then press Ctrl + H on your keyboard to open the History tab.
- Look from the History list of the website that is causing “Access Denied.” Right-click on the selected site, then click “Forget About This Site” from the menu.
- Try to open the website this time and see if you still see the error message.
Solution #2: Clear all the Site Data of the Website in Chrome
When it comes to clearing data, Google Chrome and Firefox have similar options in clearing cookies for a particular website. So, if you are dealing with this issue alone, then how about trying this solution first before deleting everything in just a single click.
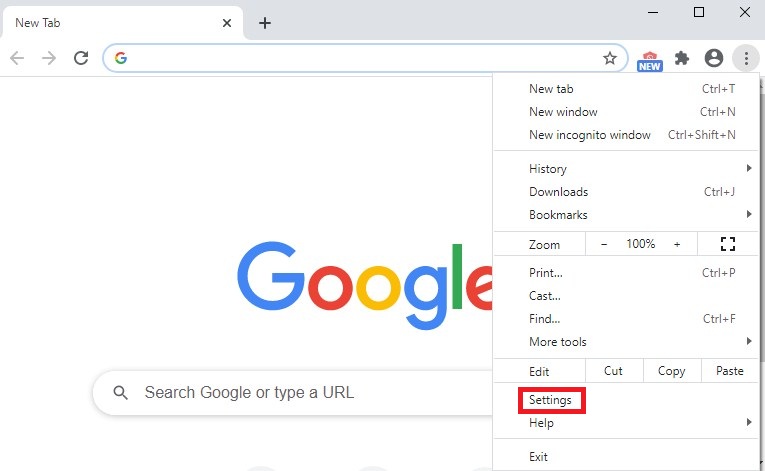
- Open your Google Chrome, then click the More icon and click again on Settings. You can find this icon represented by three dots arranged vertically in the upper right corner of your screen.
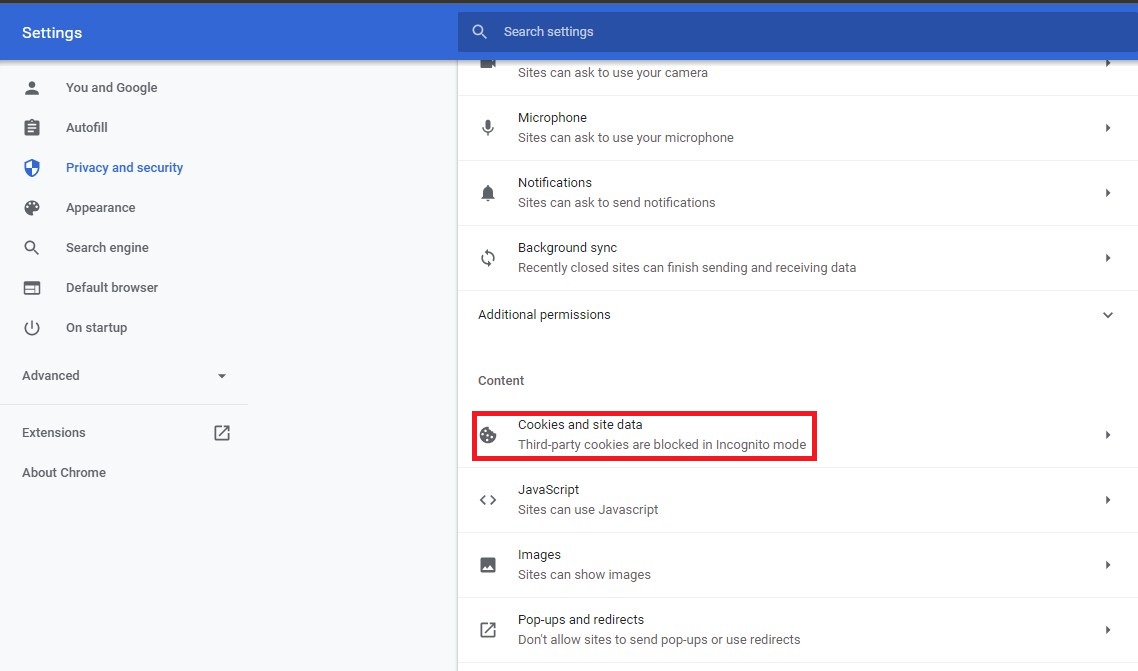
- On the left side corner, you will find various options where you can choose from, including “Privacy and security,” then click the Site settings.
- Within the Site settings menu, you can find several available options where you choose from. Look for “Cookies and site data” from the list of options to see all of your cookies.
- Now search the domain of that annoying website, then click the “Delete” button.
- You’re now good to restart your browser and see if the problem persists when you reaccess the website.
Solution #3: Turning Off Your VPN or VPN Extension
VPN software is beneficial indeed, but there are times that it can cost you unavoidable and unwanted errors. If you have a VPN installed on your computer, temporarily disable it for now.
- How to Disable VPN extension in Google Chrome
- Open your Google Chrome browser, then click the More icon and click again on Extensions. You can find this icon represented by three dots arranged vertically in the upper right corner of your screen. Or, you can type chrome://extensions, either which way you prefer will do.
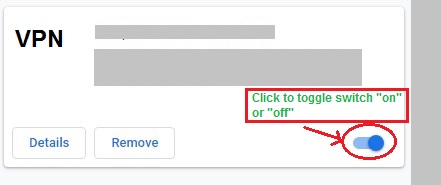
- Look for the VPN Extension that you have installed. On the lower right side, you will see a toggle to switch “on” or “off.” For now, switch it “off” temporarily.
- Keep in mind that if you still need your VPN extension, then do not click on the Remove button. Otherwise, you will need to reinstall the extension should you need to use it again.
How to Disable Your VPN extension in Firefox
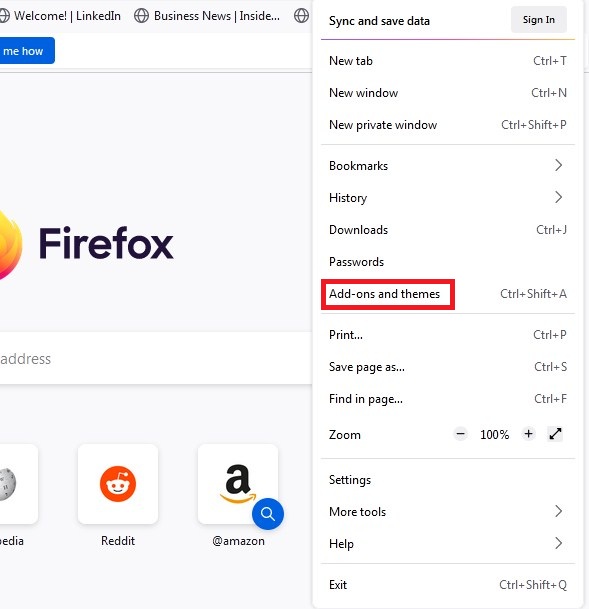
- Open your Firefox browser, then click the “Open application menu” icon and click again on Ads-on and themes. You can find this icon represented by three dashes arranged vertically in the upper right corner of your screen. Or, you can type addons.mozilla.org/ – whichever way you prefer will do.
- Look for the VPN Extension that you have installed. On the lower right side, you will see a toggle to switch “on” or “off.” For now, switch it “off” temporarily.
- Note that if you still need your VPN extension, do not click the Remove button then. Otherwise, you will need to reinstall the extension should you need to use it again.
How to Disable VPN extension in Microsoft Edge
- So, if you are a Microsoft Edge user, simply type the link in the web address bar: edge://extensions/
- Then find the VPN extension that you have installed. Click on the button located at the lower right side to toggle the switch “off.”
- Remember not to click on the “Remove” button. Otherwise, you might need to install it again should you need it back in the future.
Solution #4: Disable Your Proxy Server in Windows 10
If you are not using a VPN extension, then you might be using a proxy server for your LAN (Local Area Network). So, let’s check your proxy setting. Don’t forget to turn the feature off since we are going to test if the cause of the error was due to its configuration.
- Press and hold Windows + S using the keyboard shortcut keys to open the Windows search box.
- Type in the search box “Internet Options” and click on the search result that comes up first.
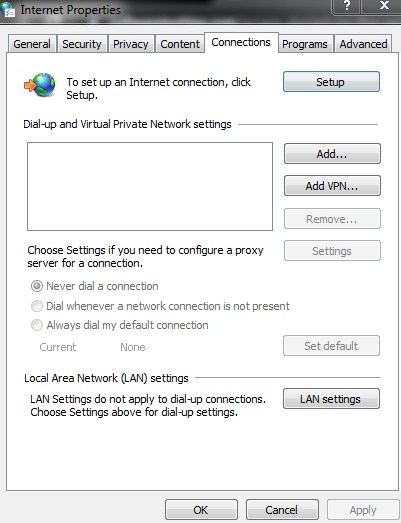
- An “Internet Properties” window will pop up with several tabs. Click on the “Connections” tab, then click again on the LAN settings to open the LAN (Local Area Network) settings window.
- Deselect the check box of the “Use a proxy server for your LAN” option if it is marked. If the check box is not marked, the problem is not related to the proxy server.
- Click “OK” now to save the changes you have made.
Solution #5: Use a Premium VPN
Generally, free VPNs usually cause poor internet connection and give you minimal benefits. While premium VPN is costly, it’s worth the pay anyway by eliminating errors and offering several premium VPN features you can’t enjoy from a free VPN.
Finding the right VPN fitted to your browsing necessities could be arduous, but below are lists of top-selling VPN services that might interest you:
- Avast HMA Pro VPN
- Surfshark VPN
- Express VPN
- NordVPN
Once you’ve purchased and installed your new Premium VPN, try accessing the website where you got that “Access denied” error to see if it is now working well.
Solution #6: Clear the Web Browser Data
Try clearing your browser data to remove cookies and histories. Here’s how to do it:
Clear your Web Browser in Google Chrome
- Press and hold “Ctrl + Shift + Del” to open the pop-up window from Chrome Settings to delete the cookies and browsing history.
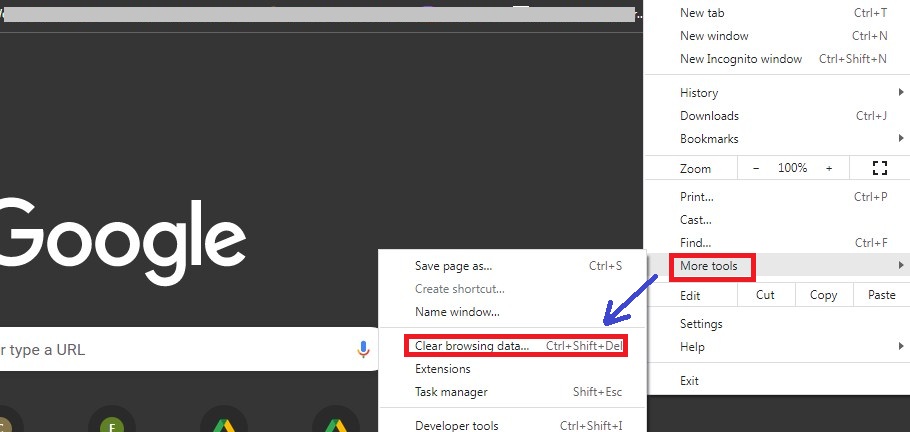
- Alternatively, you can click the More icon located in the upper right corner of the browser, represented by three dots arranged vertically. Click on “More tools,” then click on “Clear browsing data.”
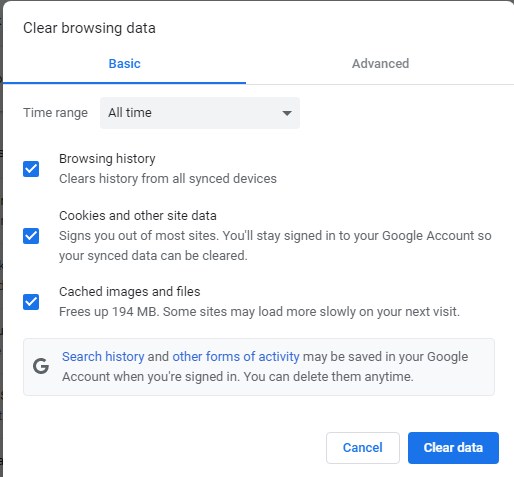
- You will be redirected to Chrome “Settings” page, where a pop-up “ Clear browsing data” window appears so you can delete the cookies and browsing histories. Then click the Clear data button to clear your browser from cookies and browsing histories.
- Restart your Google Chrome and see if the error persists.
Clear Your Web Browser in Firefox
- Open your Firefox browser, then click the “Menu” button represented by three dashes arranged vertically in the upper right corner of your screen, then click the “Option.” Or, you can type the “about: preferences” on the address bar – whichever way you prefer will open the “General Settings” page. Now, click on the “Privacy and Security” button to see the “Browser Privacy” page.
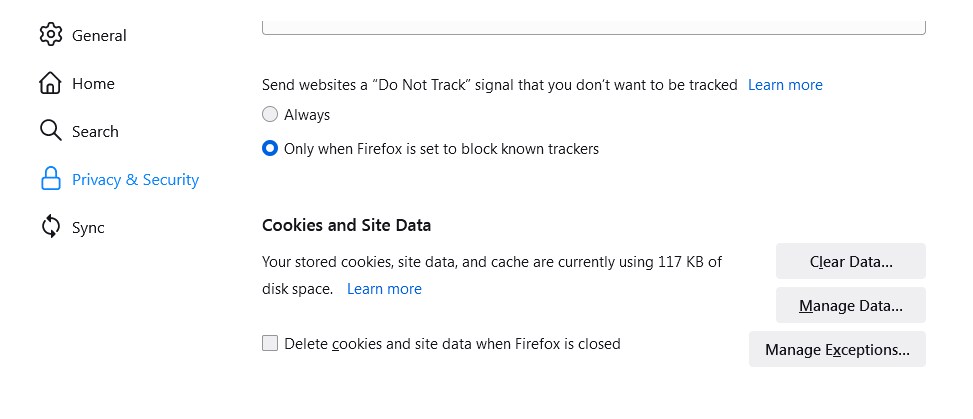
- On the “Browser Privacy” page, locate the “Cookies and Site Data” then click on the “Clear Data…” option. If you like, you can delete the cache, but it’s not that necessary though.
- So now, all you need to do is wait until the browser clears the browser data before you restart the browser and see if the problem has been resolved.
Clear Your Web Browser in Microsoft Edge
- Open your Microsoft Edge browser, then click on Settings. You can also type edge://settings on the address bar, then hit the “Enter” key. Whichever way you think you’re comfortable in doing so.
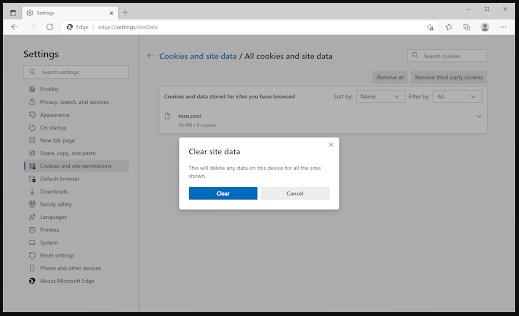
- Choose the “Cookies and site permissions.” Now click on the “Manage and delete cookies and site data” button located at the top of the page.
- Click on the option “See all cookies and site data” button. You will be redirected again to a new page.
- On the new page, click on the “Remove all” button. A pop-up warning message will appear on your screen to confirm if you would like to proceed with the clearing process. Read the warning indicated in the pop-up and click on “Clear” if you wish to proceed.
- Recheck the website and see if the “Access denied” problem is now accessible.
Solution #7: Reset the Browser
- How to Reset Google Chrome browser
- Open your Google Chrome, then click the More icon and click again on Settings. You can find this icon represented by three dots arranged vertically in the upper right corner of your screen.
- On the left side corner, you will find various options where you can choose from, including “Privacy and security,” then click the Site settings.
- Scroll down until you find the “Advanced settings,” then expand it. Scroll down again till you reach the “Restore settings to their original defaults.”
- A pop-up warning message appears on your screen. Read the warning first before clicking on the “Reset settings” if you agree to restore your browser to the default configuration.
How to Reset Mozilla Firefox browser
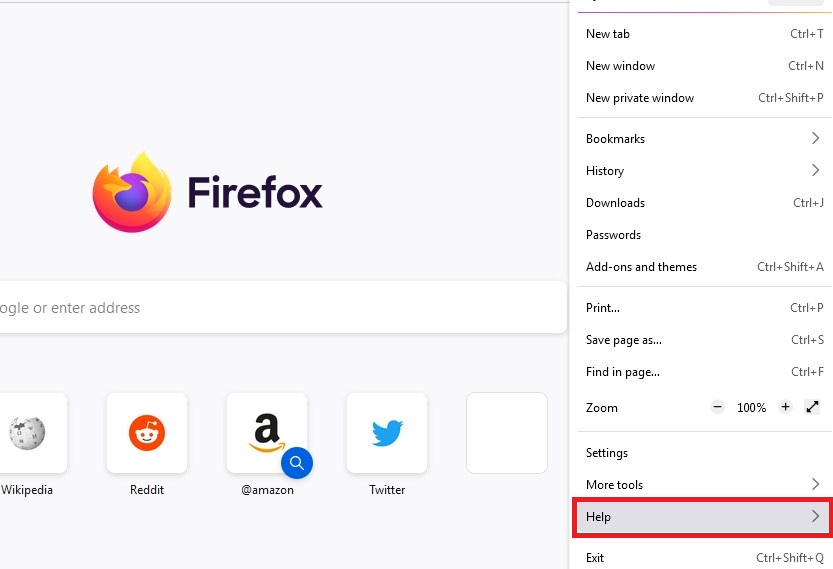
- Open your Firefox browser, click the “Menu” icon in the upper right-most on your screen, and click “Help” from the drop-down menu.
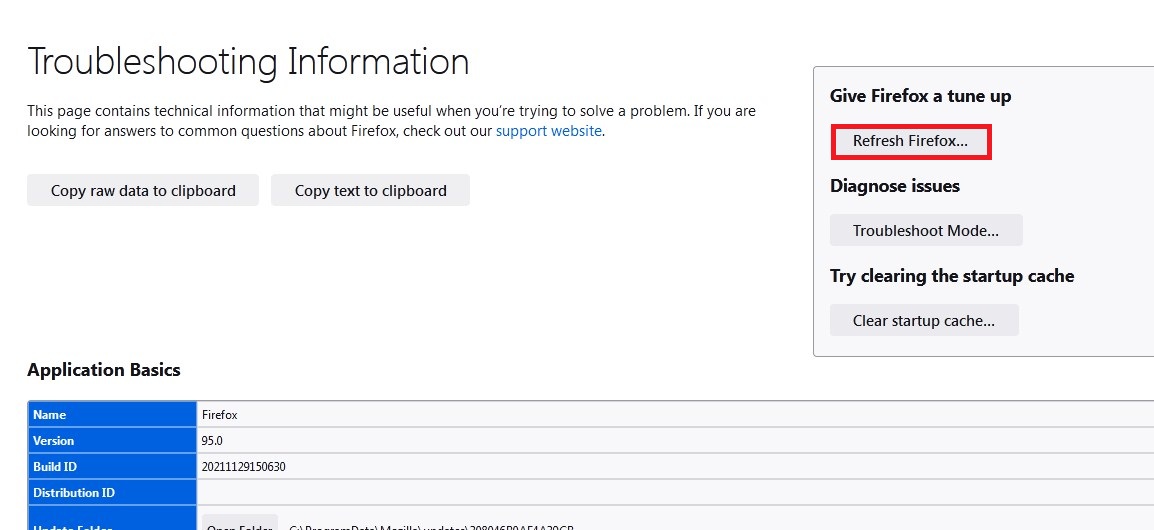
- After clicking the “Help” option, click on the “Troubleshooting Information” option. Or, you can simply type “about: support” in the address bar, and Firefox will open a new page. Both preferences will give you the same result.
- Now, click on the “Refresh Firefox” from the boxed options on the right-most corner of your screen.
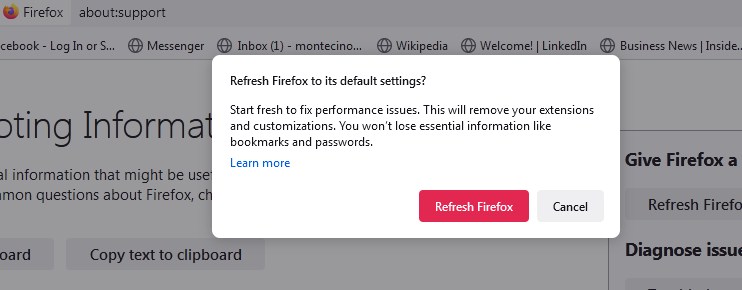
- A pop-up warning message will appear to confirm whether you will proceed with the process or cancel. Click “Finish” to restart Firefox.
- Check if you can now access the website without being prompted again with an “Access denied” error.
How to Reset Microsoft Edge browser
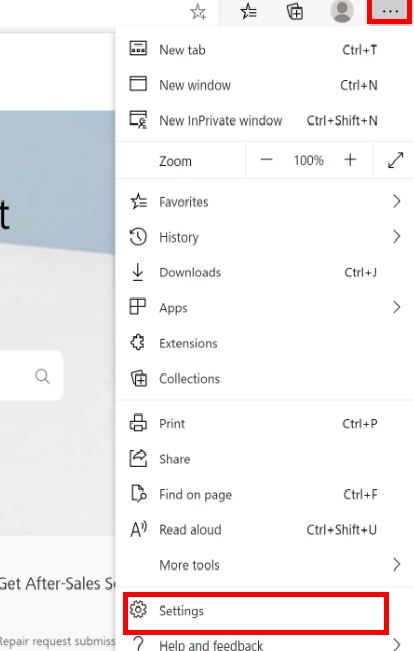
- Open Microsoft Edge browser, then click on the dots located in the upper right corner of your screen to open the “Menu.”Click on the “Settings” option.
- Choose the “Reset Settings” tab, and click on the “Restore settings to their default values.” A pop-up warning message will appear to confirm whether you will proceed with the process or cancel. Check if you can now access the website without being prompted again with an “Access denied” error.
Final Thoughts
There are many ways to fix this kind of error that requires minimal effort on your part, and we hope that this article was able to help with the solutions offered herein.
If you want to know more about other computer-related issues, please head on to our website as we have numerous blogs that can help you with.


